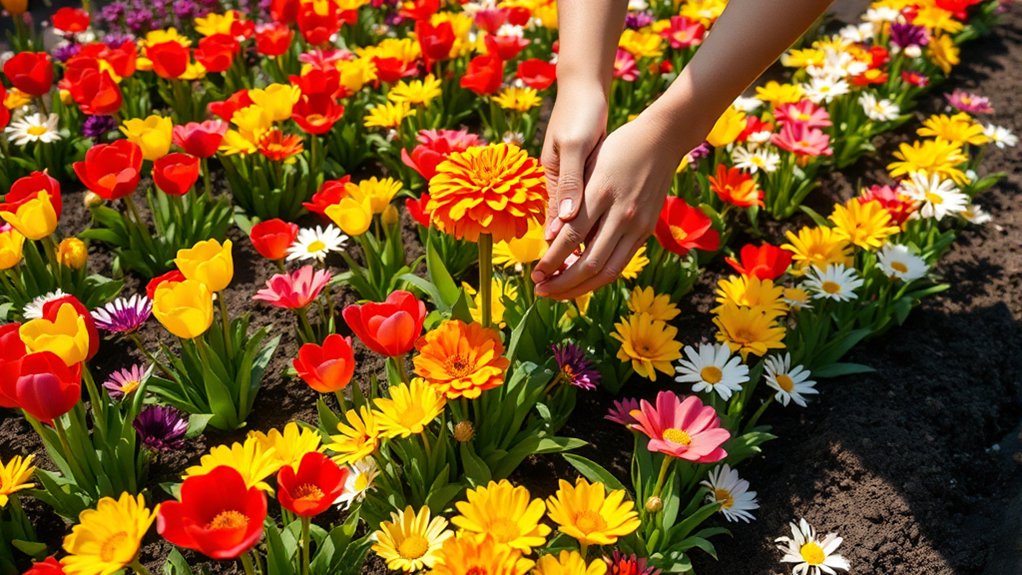
How to Arrange Flowers in a Flower Bed in 10 Steps
If you’ve ever wanted to create a beautiful flower bed but felt overwhelmed by the process, you’re not alone. Many people struggle with choosing the right spot, selecting compatible flowers, and arranging them so the bed looks stunning all season long.
Luckily, with a few simple steps, you can design a vibrant flower bed that thrives and brightens up your garden.
Choose the best spot for your flower bed by checking sunlight, drainage, and seasonal shade. Gather tools, clear weeds, loosen the soil, and mix in needed amendments. How to Arrange Flowers in a Flower Bed.
Pick flowers that thrive in the same conditions, then sketch your layout.
Place tall blooms at the back, mid-height plants in the center, and low growers along the edge. Leave room for mature growth, then water deeply, mulch, and maintain weekly so your bed keeps looking full and colorful as the season unfolds.
Key Takeaways
- Choose a flower bed location with the right sunlight, drainage, and seasonal shade for your flowers.
- Prepare the soil by removing weeds, loosening it, and adding needed amendments before planting.
- Select flowers with similar growing needs and arrange them by height, with tall plants at the back.
- Space plants properly and group them in natural drifts, keeping low-growing flowers along the front edge.
- Maintain the bed by watering deeply, mulching, deadheading, and checking regularly for pests and disease.
Choose the Best Spot for Your Flower Bed

Where should you place your flower bed? Start by watching sun exposure across the day, because different flower varieties need different light. Match the spot to your local climate so blooms won’t scorch or sulk.
Check drainage considerations after rain; a low, soggy area can weaken roots and invite trouble. Think ahead to seasonal changes, too, since trees and fences can shift shade patterns.
Check drainage after rain; soggy ground weakens roots, and shifting shade can change the site over time.
You’ll also want a location that supports your color schemes from the view you use most, like a porch or window. If deer, rabbits, or birds visit often, choose a site that reduces wildlife attraction or lets you monitor damage easily.
Good placement can also help pest management by improving airflow. Finally, consider companion planting opportunities nearby, and notice whether the spot suits the soil nutrients your chosen flowers prefer. The best location makes maintenance easier and your display more balanced all season.
Gather Tools and Prepare the Soil

Gather your tools before you begin so the work goes smoothly: a spade, rake, trowel, gloves, and a watering can are usually enough. Smart tool selection saves time and keeps you comfortable, so choose sturdy tools that fit your hands.
Next, clear weeds, stones, and debris from the bed, then loosen the topsoil with your spade. Break up compacted clumps so roots can spread easily.
If the soil feels heavy or sandy, soil testing can tell you what it needs before you add anything. Follow the results to mix in compost or other amendments, and rake the surface level when you’re done.
Lightly water the bed to settle the soil without making it soggy. A smooth, loose, well-prepared bed gives your flowers a strong start and makes planting easier.
Pick Flowers That Grow Well Together

You’ll get the best results when you choose flowers that bloom well together and actually support each other in the bed. It’s a good idea to check that each plant prefers the same sun and soil conditions so they can really thrive side by side. When you keep these needs in mind while planning, your flower bed will stay healthier and look more balanced too.
Compatible Bloom Pairings
When you choose flowers that share similar sunlight, water, and soil needs, your bed stays healthier and easier to maintain. Build companion planting groups that support each other, like marigolds with zinnias for color harmony and steady seasonal blooms.
Pair lavender with roses for fragrance pairing that feels balanced and inviting. Mix coneflowers, salvia, and bee balm to boost pollinator attraction while adding foliage contrast and texture variety.
You can also combine daisies with black-eyed Susans for a cheerful, low-fuss display. Keep maintenance tips simple: group plants by height, bloom time, and growth habit so you can water, deadhead, and trim them efficiently.
When you match compatible bloom pairings, your flower bed looks fuller, lasts longer, and needs less correction later.
Matching Sun And Soil
Sun and soil set the rules for a thriving flower bed, so choose plants that like the same conditions. Match each flower’s sun exposure, soil type, and climate considerations before you plant.
If one spot stays wet, add drainage solutions or move in moisture-loving blooms. Use flower preferences to group varieties that need similar care, and you’ll spend less time troubleshooting.
| Sun exposure | Soil type | Good match |
|---|---|---|
| Full sun | Sandy | zinnias, marigolds |
| Partial sun | Loam | asters, begonias |
| Shade | Rich, moist | impatiens, ferns |
Keep seasonal blooms in mind so color harmony lasts from spring through fall. Healthy matches also support pest management, since stressed plants attract more problems.
Sketch Your Flower Bed Layout
First, measure your flower bed’s length and width so you know exactly how much space you have to work with. Once you’ve got those numbers, grab some paper and sketch out the outline of your bed.
Next, mark where each plant will go on your sketch. Doing this little layout helps you make sure each flower has enough room to grow and keeps everything looking balanced and nice.
Measure Bed Dimensions
Before you choose plants, measure the length and width of your flower bed and sketch the outline on paper. This way, you can see exactly how much space you have to work with. Record the bed width and bed depth, then note any curves, corners, or narrow sections that change the usable area.
If your bed borders a wall, fence, or walkway, include those edges in your sketch so you can plan realistically. Use a tape measure, and write each dimension down immediately to avoid guessing later. A simple scale drawing helps you compare plant sizes, spacing needs, and visual balance before you buy anything.
When you know the exact dimensions, you can arrange flowers with confidence. This helps you create a design that fits neatly without crowding or wasted space.
Mark Plant Placement
With your measurements in hand, sketch the flower bed on graph paper or plain paper and mark where each plant will go. Place taller flowers at the back or center, depending on the bed’s view, and set shorter blooms along the edges.
Group plant companions together so they support each other’s growth and reduce pest problems. Leave enough space for mature sizes, airflow, and easy weeding. Use symbols or colors to show each variety, then note sun, shade, and water needs beside them.
If you’re planning seasonal rotation, mark which spots will change later so you can swap annuals without disturbing perennials. Review the layout from all sides before you dig, and adjust any crowded or awkward sections now.
Place Tall Flowers at the Back
Placing tall flowers at the back of your flower bed helps every plant get the light it needs and keeps shorter blooms from disappearing behind them. When you arrange by flower height, you create natural visual balance that feels calm and complete. Use the tallest stems as a backdrop, and let them frame the rest of your planting plan.
| Tall flower choice | Effect |
|---|---|
| Delphinium | Lifts the whole bed |
| Sunflower | Adds cheerful drama |
| Hollyhock | Creates a soft wall |
| Foxglove | Brings gentle elegance |
You’ll notice the bed feels more welcoming when tall blooms anchor it. Their upright shape can make you smile before you even step closer. Keep each plant spaced so air can move around it, and check that each stem stands securely.
When you give the tallest flowers a strong position, you guide the eye naturally and make the whole bed feel intentional.
Layer Mid-Height Flowers in the Middle
Once the tallest flowers are in place, fill the middle of your bed with mid-height blooms to soften the shift from back to front. Choose mid-height varieties that echo the colors or shapes of your taller plants, but don’t match everything exactly.
This middle layer gives your bed rhythm and helps each plant stand out without crowding the others. Use layering techniques by staggering plants in loose drifts rather than rigid rows. This creates a more natural look and improves depth.
Stagger mid-height blooms in loose drifts to add rhythm, depth, and breathing room to the bed.
Mix textures, too: pair spiky blooms with rounded flowers, or airy stems with fuller blossoms, so the center feels balanced and lively. Keep spacing even enough for growth, and check that no plant blocks another’s light.
When you arrange this section carefully, you create a smooth visual progression that guides the eye forward and makes the whole flower bed feel intentional.
Edge the Bed With Low-Growing Flowers
As you move to the front edge of the bed, finish the design with low-growing flowers that keep the border open and tidy. Choose compact flower types like alyssum, lobelia, calibrachoa, or dwarf marigolds to soften the edge without hiding the layers behind them.
These plants create a neat frame, guide the eye inward, and add color where visitors first look. Mix in seasonal blooms so the border changes with the weather and stays lively from spring through fall.
Plant the lowest growers in a loose line or repeating clusters, and match their colors to the taller flowers behind them for a balanced look. If you want a fuller edge, use trailing blooms that spill gently over the border stones or walkway.
This finishing layer should feel light, welcoming, and easy to maintain while still pulling the whole bed together.
Give Each Plant Room to Grow
Give each plant enough room to reach its mature size so the bed stays healthy and balanced over time. You’ll create a stronger display when you plan spacing techniques before you dig. Check each variety’s spread, then place plants far enough apart for air flow and full shape development.
Good plant compatibility matters too, because vigorous growers can crowd slower ones and hide their blooms.
- Measure mature width, not the size of the nursery pot.
- Stagger plants in groups so gaps close naturally without crowding.
- Leave extra space for varieties that branch, mound, or self-seed.
When you set plants with room to expand, you reduce competition and keep the design clear. You’ll also make later maintenance easier, since each flower can show its form and color without fighting its neighbors.
Think ahead now, and your bed will look intentional, not cramped, as the season unfolds.
Water, Mulch, and Settle the Bed
After planting, water the bed deeply so the soil settles around the roots and air pockets disappear. Aim the hose at the base of each plant and soak the entire root zone, not just the surface.
Once the water drains, check for low spots and top them off with loose soil if needed. Then spread a 2- to 3-inch layer of mulch around the flowers, keeping it a few inches from stems and crowns.
Mulch boosts water retention, helps soil stay evenly moist, and reduces splashing onto leaves. It also gives the bed a neat finish and slows erosion after rain. Use shredded bark, compost, or another light organic mulch that won’t smother young plants.
Finish by giving the bed a final gentle watering to help the mulch settle without washing it away.
Maintain Your Flower Bed All Season
Keep your flower bed looking its best by checking it regularly through the season. Walk the bed each week and remove weeds before they spread. Deadhead spent blooms so plants keep producing, and trim damaged stems to encourage healthy growth.
Watch soil moisture closely; you’ll need to water more during hot, dry spells and less after heavy rain. This seasonal maintenance keeps roots strong and flowers steady.
Inspect leaves for spots, holes, or curling that signal disease or pests. Use mulch to hold moisture and slow weed growth. Rotate your pest management tactics, using hand-picking, traps, or safe treatments as needed.
Feed hungry plants with a balanced fertilizer only when growth slows, and don’t overdo it. If a flower weakens, replace it quickly so the bed still looks full and balanced. With consistent care, your flowers stay colorful, vigorous, and ready to bloom all season.
Frequently Asked Questions
How Do I Choose a Color Scheme for My Flower Bed?
Start with the colors you love, then use a color wheel to pick pleasing combinations. You can choose analogous shades for a calm look or complementary colors for bold contrast.
Think about seasonal blooms, too, so your bed stays attractive all year. Mix one dominant color with a few accents, and repeat them throughout the space.
Don’t forget foliage color, since leaves can balance bright flowers beautifully.
Which Flowers Attract Pollinators Best?
You’ll attract the most pollinators with nectar-rich blooms like bee balm, coneflowers, lavender, salvia, sunflowers, and zinnias. Think of your bed as a buzzing banquet: pollinators prefer bright colors, simple flower types, and open centers they can reach easily.
Mix native plants with staggered bloom times, and you’ll keep bees, butterflies, and hummingbirds visiting all season. Match your choices to pollinator preferences, and your flowers will work harder for you.
Can I Mix Perennials and Annuals Together?
Yes, you can mix perennials and annuals together, and you’ll get a fuller, longer-lasting display. You should match plant heights, sun needs, and water needs to keep good flower compatibility.
Perennials give structure and return each year, while annuals fill gaps with bright seasonal blooms. Try layering them so annuals hide fading spots and add color between perennial cycles, giving your bed constant interest all season.
How Often Should I Fertilize My Flower Bed?
You’ll usually fertilize your flower bed every 4 to 6 weeks during the growing season. Choose fertilizer types based on your plants, then match application methods to the product directions.
Slow-release formulas need fewer feedings, while liquid fertilizers work faster and more often. About 70% of gardeners overfeed, so start light and watch growth.
If blooms fade or leaves yellow, you can adjust your schedule and avoid stressing your flowers.
What Tools Help With Transplanting Delicate Flowers?
You’ll want a narrow trowel, a hand fork, and a dibber for precise transplanting techniques. Use soft gloves, a small watering can, and a moisture meter to support delicate flower care.
You can also keep a pruning snip handy to trim roots or damaged stems. Slide each plant out gently, lift it by the root ball, and replant quickly so the roots don’t dry out.
Conclusion
With just a little planning, you can arrange a flower bed that looks beautiful all season. Keep in mind that mixed-height beds can boost curb appeal by up to 20%, so layering your blooms really pays off.
Keep taller flowers in back, low growers along the edge, and leave enough space for each plant to thrive. Water, mulch, and maintain your bed regularly.
You’ll enjoy a vibrant display that keeps getting better with time when you arrange flowers in a flower bed thoughtfully.