How to Prepare a Garden Bed in 7 Steps
Preparing a garden bed can feel overwhelming, especially if you’re not sure where to start or worry about doing it wrong. You’re not alone—many people struggle with getting their garden off to the right start.
But with the right steps, you can create a healthy foundation for your plants to thrive.
Start by clearing weeds, rocks, and roots so nothing competes with your plants. Next, mark the bed and measure the space to plan your layout.
Then test and loosen the soil, breaking up compacted areas. Add compost and any needed amendments to improve nutrients and drainage.
Rake the surface smooth, water the bed thoroughly, and let the soil settle. Once you’ve got the basics down, a few more details can make planting even easier.
Key Takeaways
- Clear weeds, rocks, and roots from the bed so plants won’t compete for water, nutrients, or space.
- Mark the bed’s shape and measure the area to plan spacing, borders, and access paths accurately.
- Test the soil, then loosen the top 8 to 12 inches to improve drainage and root growth.
- Mix in compost and soil amendments based on your soil’s needs to boost fertility and structure.
- Rake the surface smooth and water thoroughly. Then let the soil settle before planting.
Clear Weeds, Rocks, and Roots

Start by clearing the bed of anything that will compete with your plants. Pull weeds by the roots, not just the tops, so they don’t return and steal water, light, and nutrients.
Use hand forks, trowels, or a hoe from your garden tools to pry out rocks and stubborn roots without tearing the surrounding soil. If roots come from nearby shrubs or invasive plants, trace them as far as you can and remove every reachable section.
Use hand forks, trowels, or a hoe to remove rocks and stubborn roots without disturbing the surrounding soil.
This step supports weed control and protects soil health by reducing future crowding and decay. As you work, break up clumps only enough to free debris; don’t overwork the bed.
Check for signs of pests hiding under stones or tangled roots, since cleanup can improve pest management later. Clean, open soil gives your planting techniques a better start and helps new root systems spread quickly and evenly.
Mark the Bed and Measure the Space
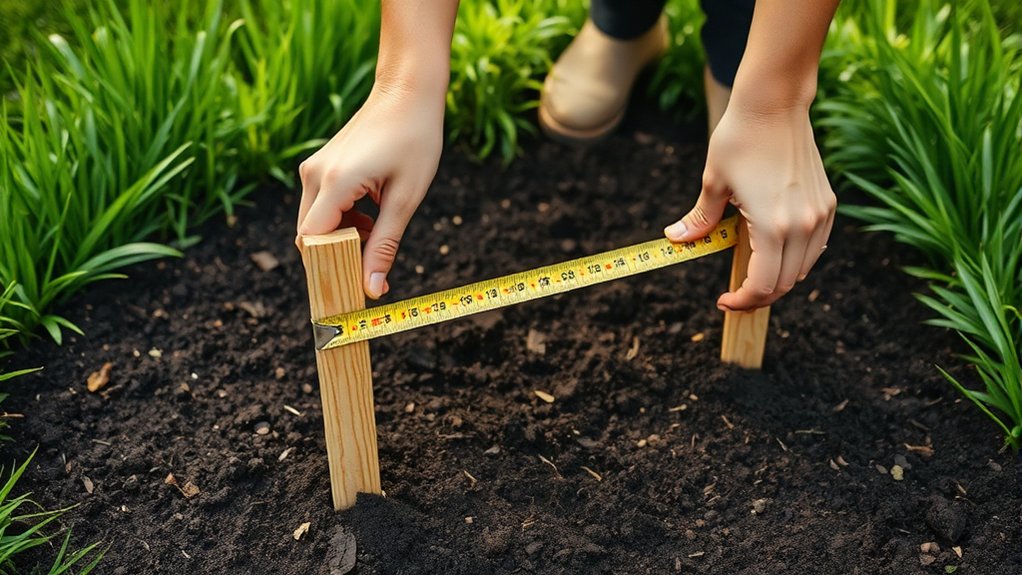
Once the bed is cleared, mark its edges and measure the space so you know exactly where to plant. Use stakes, string, spray paint, or a garden hose to outline the shape, and check that the lines look straight and balanced from every angle.
Measure the length and width, then note the bed dimensions so you can compare them with your plant list and spacing needs. If you’re planning a rectangular, curved, or raised area, sketch the outline on paper before you commit. That helps you compare layout options and keeps you from crowding plants later.
Mark paths, borders, and any corners that need extra room for walking or watering. Double-check each measurement before you move on, because even a small error can affect how many plants fit. Clear markings give you a simple guide and help you work faster once you start planting.
Test and Loosen the Soil

With the bed marked out, check the soil before you plant anything. Take a handful and feel its texture: sandy soil slips through your fingers, clay feels sticky, and loam holds firm without clumping hard. This quick soil composition check tells you how well roots can move and how much air the bed holds.
Dig a small hole, pour in water, and watch how fast it drains. If it disappears slowly, you’ve got a drainage assessment problem to note now, not later.
Next, use a garden fork or spade to loosen the top 8 to 12 inches. Push straight down, rock the tool, and lift the soil without turning it into fine dust. Break up compacted spots and remove stones, roots, and debris as you work.
Looser soil gives roots room to spread, lets water move evenly, and makes planting easier. Take your time here; a well-opened bed supports stronger growth from the start.
Add Compost and Amendments
Now that the soil is loosened, work compost into the bed to feed it and improve its structure. Spread a 2- to 4-inch layer over the surface, then mix it into the top 6 to 8 inches of soil with a fork or spade.
Choose compost types that match your garden goals: leaf mold for moisture retention, manure-based compost for extra nutrients, or finished kitchen compost for everyday enrichment.
If your soil stays heavy and wet, add coarse organic matter; if it drains too fast, include compost with more fine particles. You can also blend in lime, sulfur, or rock phosphate when a soil test shows a need.
The amendment benefits show up in better drainage, stronger root growth, and improved nutrient availability. Keep each addition balanced because too much of one material can throw off pH or fertility. Water the bed lightly after mixing so the amendments start settling in.
Rake the Surface Smooth
After the compost and amendments are worked in, rake the bed smooth so the surface is even and ready for planting. Use a sturdy rake to break up clumps, level high spots, and pull loose soil into low areas.
Work in long, steady strokes, then cross-rake from the opposite direction to refine the finish. This helps you see the bed’s soil texture and spot any buried rocks, roots, or debris you missed earlier.
If the surface still looks uneven, use your garden tools to nudge soil into place instead of pressing it down hard. Keep the top layer loose, because roots need easy contact with the soil below.
Finish by checking that the bed slopes gently only if your design calls for it, and make sure the surface looks uniform from edge to edge. A smooth bed makes planting faster and helps seeds and transplants settle in evenly.
Water the Bed Thoroughly
Water the bed thoroughly so the soil is evenly moist from top to bottom. Use a gentle hose spray, watering wand, or drip line so you don’t wash away the smoothed surface you just created.
Aim for slow, steady soaking rather than a quick splash because water needs time to move through the full root zone. If your soil is sandy, you may need to water in two passes. If it’s heavy clay, pause between passes so the moisture can sink in.
Good irrigation techniques help you avoid dry pockets and support even moisture retention, which makes the bed easier to plant. Check the soil with your finger or a trowel to confirm the dampness reaches several inches deep.
Keep the water moving until the entire bed feels consistently moist, but not soggy. This step gives seeds and transplants a reliable start and helps your garden bed perform well from day one.
Let the Soil Settle
After you water, it’s a good idea to let the soil settle for a few days before you start planting. This pause lets the bed compact naturally, giving you a smoother, better surface to work with. Take a look at the soil level after a bit, and if it’s sunk down too much, just add some more mix.
Wait Before Planting
Once you finish amending and leveling the bed, give the soil a little time to settle before you plant. During this pause, moisture moves through the bed and particles pack together naturally, so roots won’t sink into loose pockets later.
You can use the waiting period to watch soil temperature because warm soil helps seeds germinate faster and improves seed viability, while cold soil can slow them down. Don’t rush in just because the surface looks ready.
Let rain or watering do some of the settling for you, and check that the bed feels firm underfoot without being compacted. When the soil has rested, it’ll support young roots better and help your plants establish with less stress.
Check Soil Level
When the soil has had time to settle, check the bed’s level again before you plant. Use a rake to smooth high spots and fill low ones, because uneven soil can change watering patterns and hurt soil drainage. Press lightly with your foot, then recheck with a straight board or level.
If the surface dropped a lot, add more mix and let it settle again. You can also take this moment to do pH testing and confirm the bed matches your crops’ needs.
| Check | Tool | Why |
|---|---|---|
| Surface | Board | Find dips |
| Drainage | Hose | Spot pooling |
| pH | Test kit | Guide planting |
A flat, settled bed helps roots grow evenly and makes every seed start stronger.
Frequently Asked Questions
How Deep Should a Garden Bed Be for Vegetables?
For most vegetables, you should make your garden bed at least 12 inches deep. Though 18 to 24 inches works better for root crops and heavy feeders.
You’ll want loose soil composition so roots can spread easily, and good bed drainage so water doesn’t pool. If your native soil is poor or compacted, build a raised bed deeper and fill it with quality mix for healthier, stronger plants.
When Is the Best Season to Start a New Garden Bed?
You’ll usually get the best results in early spring, when the soil warms and dries enough for digging. In fact, gardeners who start beds in spring often see faster root growth because temperatures rise steadily.
Focus on soil preparation before you plant, adding compost and loosening compacted ground. If your climate is mild, you can also start in fall, but spring planting gives you the easiest, most reliable kickoff.
Which Plants Grow Best in Raised Garden Beds?
You’ll do best with vegetables, herbs, and compact flowers in raised beds. Tomatoes, lettuce, radishes, peppers, bush beans, strawberries, and carrots thrive there because you control the soil types and drainage.
Add basil, marigolds, and nasturtiums for companion planting, which can boost growth and help deter pests. If you keep the bed evenly watered and sunlit, you’ll get strong yields from these easy, productive plants all season long.
How Do I Prevent Pests in a Garden Bed?
You can prevent pests by keeping plants healthy, checking leaves often, and removing damaged growth fast. Use natural pest repellents like neem oil, insecticidal soap, or garlic spray, and try companion planting to confuse and deter insects.
You’ll also want to space plants well, water at the base, and add row covers when needed. If you catch problems early, you’ll stop most infestations before they spread.
Should I Use Landscape Fabric Under a Garden Bed?
Usually, you shouldn’t use landscape fabric under a garden bed. It can feel like a plastic blanket, but it often blocks air, water, and roots over time.
You’ll usually get better landscape benefits from cardboard, mulch, or compost instead. These fabric alternatives break down naturally and feed your soil.
If weeds are your main concern, you can layer newspaper or cardboard, then add several inches of mulch above.
Conclusion
With your garden bed cleared, measured, and enriched, you’re ready to plant with confidence. Take a last look, smooth the surface, and give the soil a good drink so everything settles in nicely.
A well-prepared bed gives your plants the best start, and as the old saying goes, “Well begun is half done.” Now you can dig in and turn that empty patch into a thriving, beautiful garden bed.