How to Grow Pumpkins in 10 Steps
Grow pumpkins can feel overwhelming, especially if you’re new to gardening or have struggled to get those big, beautiful pumpkins before. You’re not alone—many people find it tricky to know where to start or how to care for their pumpkin patch properly.
But with the right guidance, anyone can enjoy a successful pumpkin harvest.
Choose a pumpkin variety for your goal, then plant it in full sun with rich, well-drained soil and a pH of 6.0 to 6.8. Sow seeds about 1 inch deep and 3 to 5 feet apart, then water deeply at the base.
Mulch, feed, and guide vines while watching for pests. Hand-pollinate flowers, track ripening, and harvest with 3 to 4 inches of stem.
Keep going, and you’ll pick up the finer details.
Key Takeaways
- Choose a pumpkin variety suited to your space and purpose, such as pie pumpkins, carving types, or heirlooms.
- Plant pumpkins in full sun with well-drained, fertile soil amended with compost and a pH between 6.0 and 6.8.
- Sow seeds about 1 inch deep and 3 to 5 feet apart. Then water consistently without soaking the leaves.
- Feed, mulch, and manage vines to retain moisture, improve airflow, and reduce pests and weeds.
- Hand-pollinate flowers if needed, then harvest pumpkins when ripe and cure them before storage.
Choose the Best Pumpkin Variety
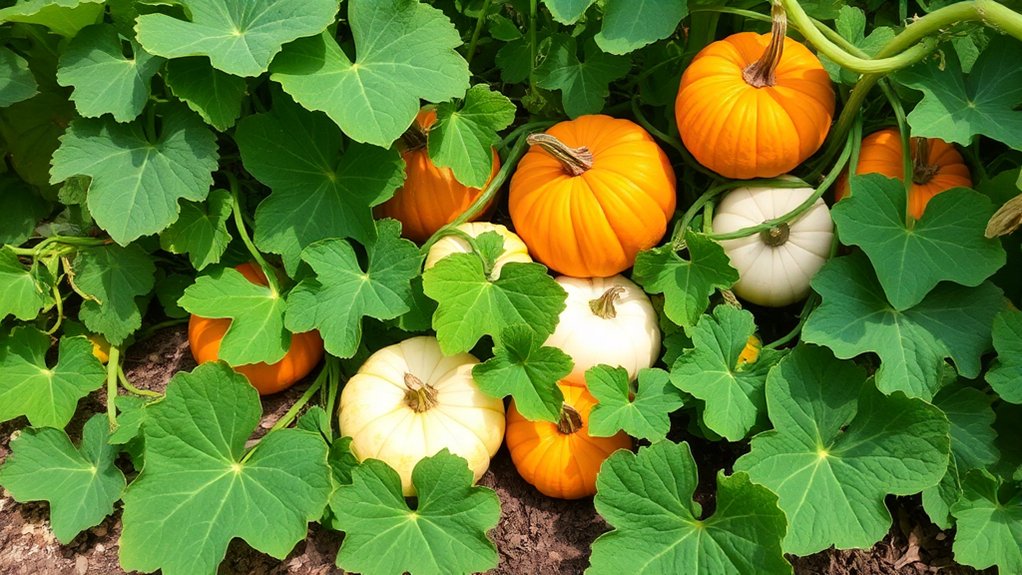
Picking the right pumpkin variety sets you up for a better harvest. You’ll want to match the plant to your goals, whether you want pies, carving, or decoration. Check pumpkin characteristics like size, color, rind thickness, and days to maturity before you buy seeds.
Small sugar types often give you sweeter flesh and fit better in compact gardens, while larger carving pumpkins offer broad, sturdy shells for jack-o’-lanterns. If you like rich flavor and unique shapes, investigate heirloom varieties; they can add depth, color, and old-fashioned charm to your patch.
Read seed packets carefully so you know how much space each vine needs and how long it takes to ripen. Choose disease-resistant options when possible, especially if you’ve struggled with mildew or pests before. By selecting a variety that fits your needs and climate, you’ll save effort and grow pumpkins you’ll actually use.
Pick a Sunny Pumpkin Planting Spot

You’ll want to pick a spot that gets full sun all day. Pumpkins need lots of light to grow strong, so a sunny location is key. It’s best to choose a warm place that helps the soil heat up quickly in spring. Also, try to avoid low spots where cold air tends to settle.
Good drainage is important too. Soggy soil can stunt the roots and even rot your plants, so make sure the site drains well. That way, your pumpkins will have the best chance to thrive.
Full Sun Exposure
Pumpkins need plenty of direct sunlight to grow well, so choose a planting spot that gets at least 6 to 8 hours of full sun each day. You’ll meet your pumpkin’s sunlight requirements best in an open area without tree cover, tall fences, or buildings casting shade.
Give the vines room to spread, and make sure nearby plants won’t block light as the season progresses. With ideal sunlight, your pumpkin plants can produce stronger vines, fuller leaves, and better fruit set.
Check your garden at different times of day to confirm the site stays bright from morning through afternoon. If shadows move across the space, pick a sunnier area instead. Consistent sun exposure helps your pumpkins grow vigorously and supports a healthy harvest.
Warm Soil Location
Choose a planting spot where the soil warms up quickly in spring, since pumpkins germinate and grow best in warm ground. You should look for a sunny area near a south-facing wall, fence, or open yard that traps extra heat.
These warm microclimates can raise soil temperature faster after cold nights and help seedlings establish sooner. If you can, wait until the ground feels pleasantly warm before you sow seeds or set out transplants. You’ll give your pumpkins a stronger start and reduce slow, chilly growth.
Darker soil or nearby stone paths can also absorb heat and release it through the day. Pick a site that gets morning sun, too, so the soil dries and warms early each day for vigorous vines.
Good Drainage Matters
Even in a sunny spot, pumpkins need soil that drains well, because soggy ground can slow growth and rot roots. You should choose a slight slope or raised bed so rain moves away from the vines. If your soil stays wet after storms, add a soil amendment like compost to improve structure and boost airflow. Good drainage keeps roots healthy and helps fruits swell evenly.
- Test the spot after heavy rain; puddles shouldn’t linger.
- Mix in drainage solutions such as coarse compost or sand only if your soil is dense.
- Plant on mounds when your yard holds water.
With these steps, you’ll give pumpkins the airy, dry footing they need for strong growth and a better harvest.
Prepare Rich, Well-Drained Soil

Start by giving pumpkins a fertile foundation with soil that’s loose, rich, and drains well. You can improve heavy ground with compost, aged manure, or other soil amendments, then mix them in deeply so roots can spread easily. Aim for a pH balance between 6.0 and 6.8, because pumpkins feed best in slightly acidic soil.
If your garden stays soggy, build raised beds or shape broad mounds to help excess water move away.
| Soil issue | What you add | Result |
|---|---|---|
| Poor fertility | Compost | Stronger growth |
| Tight clay | Sandless organic matter | Better airflow |
| Low pH | Garden lime | Balanced nutrients |
After you work the bed, rake it smooth and remove rocks or debris. A crumbly, moisture-holding texture gives your plants the steady nutrients and drainage they need for vigorous vines and big harvests.
Plant Pumpkin Seeds Correctly
Space pumpkin seeds about 3 to 5 feet apart so each vine has plenty of room to spread out. You’ll want to plant them about 1 inch deep in the soil, then cover them gently. After that, give the area a good watering to help the seeds settle in and get started on growing.
Seed Spacing Guidelines
Give each pumpkin seed plenty of room, because crowded plants struggle to spread their vines and set healthy fruit. You’ll get better results when you match spacing techniques to your seed types and the variety’s mature size. For standard pumpkins, leave generous gaps so each plant can claim sun, air, and moisture without competing.
- Space bushier types farther apart than compact guides suggest.
- Place vining types in wide rows so the vines can travel.
- Thin extras after sprouting, keeping the strongest plant in each spot.
If you’re planting in mounds or rows, keep the layout simple and consistent. Good spacing reduces mildew, improves airflow, and helps you harvest larger, better-shaped pumpkins later.
Proper Planting Depth
Once you’ve set your spacing, plant each pumpkin seed at the right depth so it can sprout quickly and anchor well. Make a hole about 1 inch deep in loose soil, then drop in one seed with the pointed end down if you can tell.
Cover it lightly and press the surface gently to remove air pockets. These planting techniques help the seed stay moist and stable without being buried too far.
If your soil temperature is still cool, wait until it warms enough for reliable germination; pumpkin seeds dislike cold ground. Planting too deep can slow emergence, while too shallow can dry the seed out or expose it to birds.
Keep your depth consistent across the row, and you’ll give each seed the best start.
Watering After Sowing
After sowing your pumpkin seeds, water the bed gently so the soil settles around each seed without washing it away. Keep the top inch evenly moist, but don’t soak it. You want steady post sowing moisture, not puddles that chill the seed or invite rot.
- Check the soil daily with your finger.
- Rewater when the surface starts to dry.
- Adjust irrigation frequency as temperatures rise or rain falls.
If you mulch lightly, you’ll slow evaporation and reduce how often you need to water. Use a fine spray or watering can, and aim at the soil, not the seed row. Consistent moisture helps the seeds swell, split, and send out roots fast.
Water Pumpkin Vines Deeply
Soak pumpkin vines deeply at the soil level to encourage strong roots and steady growth. You should water slowly so the moisture sinks into the root zone instead of sitting on the surface. Aim the stream at the base of each plant, and avoid wetting the leaves whenever you can.
Deep watering supports vine health because it helps roots grow downward, where soil stays cooler and more reliable. Check the soil with your finger before watering again; if the top few inches feel dry, it’s time to water.
Consistent deep soaking also improves moisture retention, especially during hot, windy weather. Water early in the day so the vines can dry off before nightfall. If you water deeply and less often, you’ll train your pumpkins to handle dry spells better.
Keep the soil evenly moist, not soggy, and your vines will respond with steady, vigorous growth.
Feed and Mulch for Bigger Vines
To push pumpkin vines into stronger, bigger growth, feed them with a balanced fertilizer or compost once they’re established. Then mulch around the plants to hold moisture and keep weeds down. Use organic fertilizers if you want a slow, steady nutrient boost that supports leafy growth without pushing too hard.
Spread a 2- to 3-inch layer of mulch types like straw, shredded leaves, or grass clippings around each plant, but keep it a few inches from the stems.
- Side-dress every few weeks with compost or a balanced feed to keep vines vigorous.
- Refresh mulch after heavy rain so the soil stays cool and evenly moist.
- Watch vine color and growth; pale leaves often mean you need more nutrients.
When you feed well and mulch correctly, you’ll help your pumpkins build the strong vines they need for healthy fruiting later.
Guide Vines and Stop Common Pests
As your pumpkin vines stretch and spread, guide them early so they grow where you want and don’t tangle into a thick mess. Gently lift runners and set them across open soil, then pin them with small stakes or rocks if they wander into paths. This simple vine training keeps leaves in the sun and improves airflow.
Check plants often for squash bugs, cucumber beetles, and aphids, because quick pest management stops damage before it spreads. Remove eggs, hand-pick pests, and wash clusters off with water when you can.
| Problem | What you do |
|---|---|
| Wandering vines | Redirect and secure them |
| Chewed leaves | Inspect under leaves |
| Insects on stems | Remove or rinse them |
Keep weeds down, too, since they hide pests and steal water. With steady attention, you’ll protect your pumpkins and help them grow strong.
Pollinate Pumpkin Flowers by Hand
To hand-pollinate pumpkins, start by spotting the male flowers—they have thin stems and pollen-covered centers. Once you find one, pick it and carefully remove its petals. Then, take that pollen and gently brush it onto the center of a female flower. This easy step can really help improve fruit set, especially when the bees aren’t doing enough work.
Identifying Male Flowers
Look for the male pumpkin flowers first, since they usually appear before the female blooms and do the job of supplying pollen. You can spot them on thin stems with no swollen base behind the blossom. Their center holds a straight, pollen-covered stamen, while female flowers have a tiny fruit-shaped swell.
Use these flower identification techniques to avoid confusion when you inspect vines early in the morning.
- Check the stem: male flowers sit on narrow stalks.
- Study the center: male flower characteristics include a single pollen-bearing structure.
- Compare bloom shapes: males look simpler and lack fruit behind the petals.
When you learn these details, you’ll recognize the right flowers quickly and keep your pumpkin patch ready for successful pollination.
Hand Pollination Steps
Once you can identify the male and female blossoms, hand pollination is simple. In the early morning, pick a freshly opened male flower, peel back its petals, and gently brush the pollen-covered stamen onto the stigma in the center of a female flower. Use light, even strokes so you don’t damage the bloom.
If you prefer, remove the male petals and dab the anther directly onto the female stigma as one of the easiest pollen transfer techniques. Check flower timing, because pumpkin blossoms open for only a few hours and the pollen works best before midday heat dries it out.
Pollinate several female flowers to boost your harvest, then leave the blooms undisturbed so bees and weather won’t interrupt fruit set.
Monitor Pumpkin Ripening
As harvest time approaches, keep a close eye on your pumpkins for signs they’re fully ripe. Check pumpkin color first; it should deepen to a rich, even orange or the shade your variety should show. Feel the rind, too: it should resist your thumbnail and no longer look glossy.
Ripening time varies by cultivar, so track your planting date and watch how weather impact can speed or slow maturation. Healthy vine health also helps fruit finish properly, along with balanced nutrient requirements and good pest resistance during the season.
If nights stay warm, monitor the ideal temperature range and keep notes on which fruits mature first.
- Look for hard skin and dry stems.
- Compare color and size with mature fruit.
- Use gentle harvesting techniques only when ripeness is clear.
Harvest and Cure Pumpkins Properly
When your pumpkins have fully ripened, harvest them carefully to protect both the fruit and the vine. Use clean pruners or a sharp knife, and leave 3 to 4 inches of stem attached, because a broken stem shortens pumpkin storage life.
Handle each pumpkin gently; bruises and cuts invite rot. After harvest, wipe off excess dirt but don’t wash the skin since moisture can encourage decay. Place the pumpkins in a warm, dry, sunny spot for 7 to 14 days so they can heal and harden.
These curing techniques toughen the rind, seal minor wounds, and improve flavor. Keep them off wet ground and turn them occasionally for even drying. Once cured, move them to a cool, dry area with good airflow.
Check them regularly and remove any that soften, crack, or show mold. Proper harvesting and curing help you enjoy firmer pumpkins and longer-lasting storage all season.
Frequently Asked Questions
How Long Do Pumpkin Seeds Stay Viable?
Pumpkin seeds usually stay viable for 4 to 6 years, and sometimes longer if you store them well. You can extend seed life with cool, dry seed storage methods in airtight containers.
To check older seeds, try simple seed viability tests before planting. If most seeds sprout, they’re still good. If germination drops a lot, replace them for better results and stronger seedlings in your garden this season.
Can Pumpkins Grow in Containers?
Yes, you can grow pumpkins in containers if you choose compact pumpkin varieties and give them plenty of room, sun, and rich soil. Use container gardening with a pot at least 20 gallons, and water often because containers dry out fast.
Train vines carefully or pick bush types for easier care. You’ll get the best results when you fertilize regularly and support developing fruit to keep plants healthy.
Which Companion Plants Help Pumpkins Most?
Sunflowers tower beside sprawling vines; borage and marigolds dot the ground, and your pumpkins benefit. You’ll want pollinator plants like alyssum, cosmos, and nasturtiums to draw bees, while nitrogen fixers such as clover, peas, and beans enrich the soil.
These companions help improve fruit set, support growth, and reduce pests. Keep them nearby, but don’t crowd your pumpkins, or you’ll steal light, air, and space.
How Do I Store Pumpkin Seeds for Next Year?
Dry your pumpkin seeds completely, then store them in a cool, dark, dry place so they’ll stay viable for next year. You should spread them on paper for seed drying for about a week, then place them in an envelope or jar.
Add seed labeling with the pumpkin variety and date, and keep the container airtight. Avoid heat, moisture, and sunlight, or your seeds may lose germination quickly.
What Causes Pumpkins to Turn Yellow?
Pumpkins turn yellow because you’re seeing pumpkin color changes from stress or ripening. Common yellowing causes include nutrient deficiencies, especially low nitrogen or potassium, too much or too little sunlight exposure, pest damage, soil pH imbalances, watering issues, and temperature fluctuations.
You should check leaves and vines for clues, then adjust care fast. If the fruit’s maturing, some yellowing is normal, but sudden color shifts usually signal trouble.
Conclusion
By following these 10 steps, you’ll turn a tiny pumpkin seed into a sprawling, sun-soaked vine that practically takes over your garden in the best way possible. Choose wisely, water deeply, and keep pests in check, and you’ll give your pumpkins the VIP treatment they crave.
When those orange beauties finally ripen, you’ll feel like a backyard wizard. Harvest carefully, cure properly, and enjoy a pumpkin haul so impressive it’ll make fall jealous. With these tips, growing pumpkins becomes a rewarding adventure you’ll want to repeat every year.