How to Plant Perennials in 10 Steps
If you’ve ever tried planting perennials and ended up with lackluster results, you’re not alone. Many people struggle with getting their plants to thrive, from choosing the right spot to ensuring proper soil conditions.
But with a little guidance, you can create a beautiful, lasting garden that blooms year after year.
To plant perennials in 10 steps, you should pick a spot that matches each plant’s sun, shade, and drainage needs. Then loosen the soil 8 to 12 inches deep and mix in compost.
Choose healthy plants with strong roots, dig a hole twice as wide as the root ball, and set the crown at soil level.
Backfill gently, water well, mulch, and keep watering and weeding as they settle in for stronger growth ahead.
Key Takeaways
- Choose a site with the right sunlight, soil, drainage, and mature space for each perennial.
- Prepare the soil by loosening it 8 to 12 inches deep and mixing in compost or aged manure.
- Select healthy plants with firm roots, clean leaves, and strong crowns before planting.
- Dig holes twice as wide as the root ball, set crowns at soil level, and backfill gently.
- Water thoroughly after planting, then keep an eye on moisture, weeds, and pests as your plants get established.
Choose the Best Spot for Perennials

Start by picking a spot that matches your perennials’ needs for sunlight, soil, and drainage. Check each plant’s sunlight requirements so you place sun-lovers in open areas and shade-tolerant varieties where trees or structures soften the light.
Notice how water moves through the space, since steady moisture levels help you avoid stressed roots and soggy roots alike. Then match the site to your soil pH preferences and the plants’ mature size.
Consider companion planting to group species that support each other’s growth and create a fuller display. If you want seasonal blooms, choose a location that lets you mix early, midsummer, and late-flowering perennials for color across the year.
Climate considerations matter too, so use sheltered spots in windy regions or cooler exposures in hot climates. Finally, think about local wildlife and your overall landscape design so your garden looks balanced and still supports pollinators.
Prepare the Soil for Perennials

Loosen the soil before planting so your perennials can root easily and access water and nutrients. Dig down 8 to 12 inches, then break up clumps and remove rocks, roots, and weeds.
Mix in soil amendments such as compost, aged manure, or leaf mold to boost fertility and help the soil hold moisture without becoming soggy. If your garden drains slowly, work in coarse sand or fine bark only when it suits your soil type, and shape the bed for drainage improvement.
Test the texture as you go; you want soil that crumbles in your hand, not hard clods or sticky mud. Rake the surface smooth, but don’t compact it by walking on the bed.
Water lightly after preparing the area so the soil settles before you set your perennials in place. Proper prep gives roots a healthier start and helps plants establish faster.
Choose Healthy Perennial Plants

When you’re picking out perennial plants, take a good look at the roots. Make sure they’re firm, moist, and not damaged in any way. Then, check the leaves—they should have a rich color, look healthy, and be free from spots, yellowing, or pests. It’s best to go for strong, vigorous plants so they can settle into your garden quickly and thrive.
Inspect Root Health
Before you buy a perennial, slip it from its pot and check the roots for signs of good health. Healthy roots look firm, light colored, and evenly spread through the soil.
If you see black, mushy, or foul-smelling roots, walk away; those clues often point to root diseases. Gently tease circling roots apart so they can grow outward after planting, and trim only the worst tangles with clean snips.
This light root pruning helps prevent girdling and encourages stronger establishment. A plant with dense, vigorous roots will settle in faster and handle stress better once you transplant it.
Avoid specimens with roots packed into a hard mass, because they may struggle to absorb water and nutrients after you plant them in your garden.
Check Foliage Quality
Healthy foliage tells you a lot about a perennial’s overall vigor. You should look for even foliage colors that match the plant’s normal range, not patches of yellow, brown, or silvering. Leaves should feel firm and show clean leaf textures, without holes, wilting, curl, or sticky residue.
Check both the top and underside of the foliage for spots, mildew, or tiny pests hiding along stems and veins. If the plant looks dusty, distorted, or limp, keep shopping. You want leaves that hold their shape and look fresh from tip to base.
Healthy foliage usually means the plant handled growing conditions well, so you can bring home a specimen that’ll settle into your garden more smoothly and reward you with strong performance.
Choose Vigorous Specimens
Look for perennials with compact, sturdy growth and multiple healthy shoots. A plant that stands upright and fills its pot is usually better established. You’ll improve plant selection when you compare each specimen for firm stems, rich color, and even growth.
Check the roots if you can; they shouldn’t circle tightly or look rotten. Healthy growth habits also show in new buds and a balanced shape.
| Sign | Why it matters |
|---|---|
| Dense crown | Shows vigor |
| No yellow leaves | Signals health |
| Moist, not soggy roots | Prevents rot |
| Many shoots | Promises quicker fill-in |
| Even stems | Suggests strong growth habits |
Skip weak, leggy plants because they often struggle after transplanting. Choose the strongest option, and you’ll give your garden a better start.
Plan Perennial Spacing
When planning your perennial spacing, start by checking each plant’s mature spread. This way, you’ll give it enough room to grow without crowding its neighbors. It really makes a difference.
Also, be sure to leave enough space between plants to improve airflow. This helps prevent disease, which is always a plus. When you space them well, your garden won’t just look fuller—it’ll perform better over time too.
Mature Plant Spread
Before you set any perennial in the ground, check how wide it will grow at maturity and give it enough room to spread. That choice pays off in mature plant benefits, like fuller blooms and stronger roots, and it supports smart companion planting too.
- Read the plant tag for final width.
- Measure the space between neighboring plants.
- Leave extra room for varieties that form clumps.
- Picture the bed in three years, not three weeks.
When you match spacing to mature size, you avoid crowding and let each plant show its natural shape. You’ll also reduce the need to move plants later, which saves time and protects roots. Good spacing now makes your perennial bed look balanced and intentional as it fills in.
Airflow Between Plants
Even with the right mature spread, you still need enough room for air to move between perennials. Good air circulation helps leaves dry faster after rain or watering, which supports disease prevention and stronger growth.
When you space plants, match their growth habits and leave gaps that improve light exposure on lower foliage. Don’t crowd aggressive varieties beside slower neighbors. Instead, use companion planting to balance the bed and reduce competition.
You should also account for seasonal changes, since plants often fill out more in summer than spring. Better spacing can aid pest management by making it harder for insects to hide.
Finally, keep soil drainage in mind, because damp, poorly aired areas can stress roots and invite rot.
Dig the Planting Hole
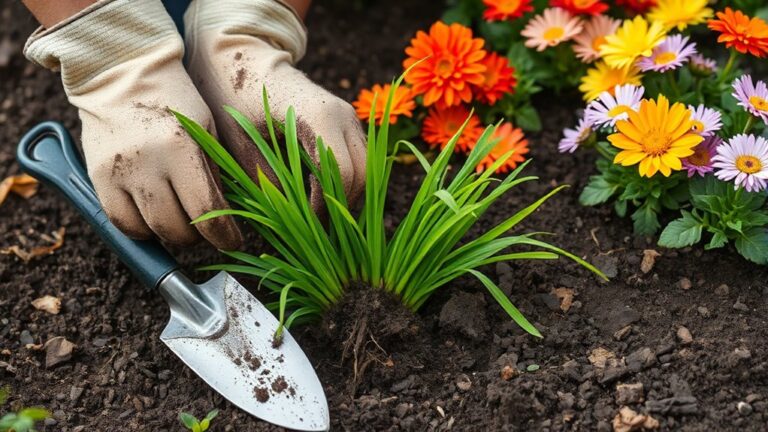
Start by digging a hole that’s about twice as wide as the root ball and just deep enough so the plant will sit at the same level it was growing before. You’ll get better results when you focus on solid digging techniques and keep the hole roomy enough for roots to spread without crowding.
- Mark the spot before you dig.
- Loosen the soil on the sides, not just the bottom.
- Check the hole often with the plant in place.
- Use the shovel to smooth rough edges.
If you hit compacted soil, break it up with a garden fork so roots can move outward more easily. Keep the excavated soil nearby because you’ll use it again when you backfill. A well-shaped hole gives your perennial a strong start and helps it settle in faster after planting.
Plant Perennials at the Right Depth
Set the perennial in the hole so the root crown sits at the right height—not buried too deep or left too high. You want to aim for the proper planting depth. Then, take a moment to check that the soil line matches the plant’s natural level. Doing a quick soil-level check now will help your perennial settle in and grow well.
Root Crown Placement
Planting perennials at the correct depth helps them establish quickly and avoids rot, stress, and poor flowering. You should keep the root crown where it can breathe, not buried too deep or left exposed. Good planting techniques help you judge the soil line and support steady growth.
- Loosen the hole so roots spread naturally.
- Set the plant so the root crown sits level with surrounding soil.
- Backfill gently, firming the soil without packing it hard.
- Water well so soil settles around the roots.
Check the plant from the side before you finish. If the crown looks sunken, lift it slightly. If it sits high, add a little soil. This simple care gives your perennial a strong start and helps it settle in with less shock.
Set Proper Depth
Getting the depth right is one of the simplest ways to help perennials thrive from the beginning. Set each plant so its crown sits at the recommended level, not buried too deep or left exposed. When you plant at the right depth, you support root development and help the plant settle in quickly.
| Depth cue | What you do |
|---|---|
| Crown level | Keep it even with the soil |
| Hole depth | Match the root ball |
| Backfill | Firm gently around roots |
| Finish | Water to aid moisture retention |
A correctly placed perennial uses less energy recovering and more energy growing. If you’re unsure, pause and adjust before you fill in the hole. Small corrections now can mean stronger growth, better flowering, and a healthier plant later.
Check Soil Level
Once the hole is ready, check the soil level before you place the perennial. You want the crown to sit level with the surrounding ground, not buried too deep or left exposed. Gently tamp the bottom, then compare the pot’s root flare to the bed surface.
If the soil settles low, add a little mix; if it’s high, remove some. Consider the soil composition, since heavy clay can hold water and sink after planting. Run a quick drainage test, too, so you know whether water will pool around the roots.
- Set the plant beside the hole.
- Match crown height to grade.
- Adjust loose soil as needed.
- Recheck before backfilling.
Backfill and Firm the Soil
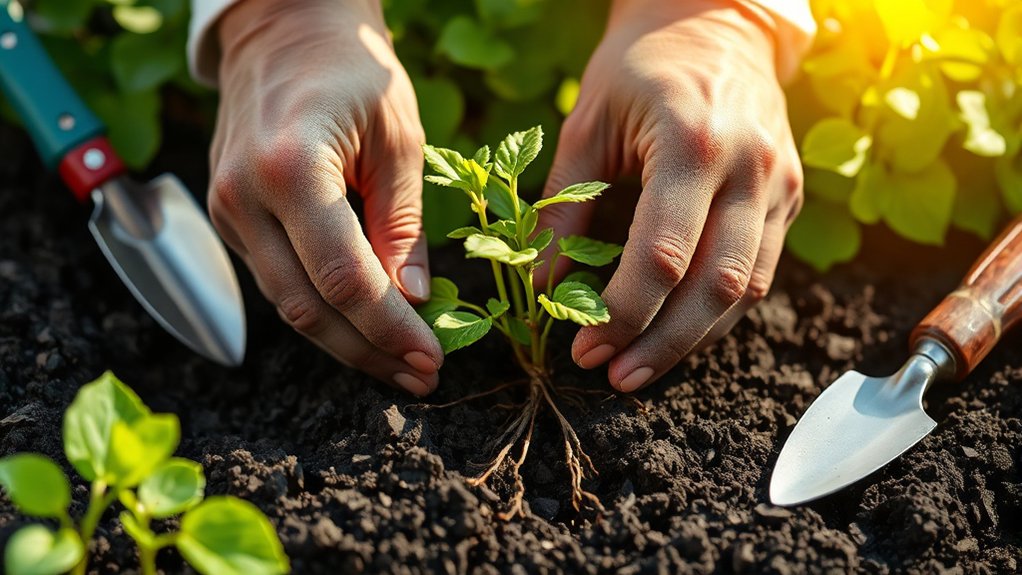
Gently return the soil around the roots, working it in a little at a time so the plant stays upright and at the same depth as before. As you backfill, break up clods and mix in loose soil so the roots can spread easily.
Keep an eye on soil composition; if your native soil is heavy clay or very sandy, blend it evenly so the plant settles into a stable, workable zone. Pay attention to drainage importance, too, because compacted pockets can trap air and water in the wrong places and slow establishment.
Watch soil composition closely, blending heavy clay or sand evenly to support drainage and healthy establishment.
After each layer, use your hands to lightly press the soil, firming it just enough to remove gaps without packing it hard. You want good root contact, not a dense crust. Build the soil level to match the surrounding grade, then check that the crown still sits slightly above the surface.
Finish by smoothing the area so the plant looks natural and secure.
Water Newly Planted Perennials
Water the planting area thoroughly right after planting so the soil settles around the roots and pockets of air disappear. Then, keep an eye on soil moisture for the first few weeks. You want the roots to stay evenly damp, not soggy, so the plant can establish itself quickly. Use watering techniques that match your garden’s conditions and the weather.
- Check the top inch of soil before you water again.
- Water slowly at the base so moisture reaches the root zone.
- Water in the morning to reduce evaporation and stress.
- Adjust your schedule after rain or cool spells.
If the soil dries out fast, give the area a deeper soak rather than short sprinkles. Consistent watering helps new perennials settle in and supports strong growth. Good moisture retention in the soil makes your efforts last longer, but you still need to monitor conditions closely.
Mulch Around Perennials
Spread a 2- to 3-inch layer of mulch around your perennials to help conserve moisture, suppress weeds, and keep soil temperatures more stable. Choose mulch materials that suit your garden and style, such as shredded bark, compost, or stone.
Organic mulch improves moisture retention and weed control while feeding the soil as it breaks down. Decorative mulch can boost aesthetic appeal in beds near paths or patios.
| Mulch type | Main benefit | Best use |
|---|---|---|
| Bark | Long-lasting coverage | Shrubs and borders |
| Compost | Soil enrichment | New plantings |
| Stone | Strong temperature regulation | Dry sites |
Keep mulch a few inches from crowns so it doesn’t trap excess dampness. Refresh mulch as it thins, and rake it lightly during mulch maintenance to keep it even.
With smart mulch application, you’ll protect roots, improve mulch benefits, and give your perennial bed a neat, finished look.
Care for Perennials After Planting
After planting, give your perennials a solid start by checking moisture regularly and watering deeply whenever the top inch of soil feels dry. Keep watching their progress so you can catch stress early and help roots settle in.
- Water at the base, not overhead, so leaves dry quickly and fungal problems stay low.
- Skip heavy fertilizer application at first; wait until new growth appears, then feed lightly if the soil needs it.
- Remove weeds around each plant, because they steal water, light, and nutrients.
- Use pest management early by inspecting stems and leaves for chewing, spotting, or sticky residue.
You should also deadhead spent blooms and trim damaged foliage to keep plants tidy and encourage stronger growth. If dry weather lingers, mulch can help conserve moisture, but leave a little space around crowns.
With steady attention, your perennials will establish well and return healthier next season.
Frequently Asked Questions
When Is the Best Season to Plant Perennials?
The best season to plant perennials is usually autumn, though spring planting can work well too. You’ll give roots time to settle before extreme heat or cold if you plant in fall, and that often means stronger growth next year.
If your climate has harsh winters, choose spring planting instead so the plants can establish safely. Either season works, but you should match timing to your weather and soil conditions.
How Long Do Perennials Take to Establish?
You’ll usually see perennials establish in one to three seasons, and some take the long haul. Good things come to those who wait, especially when you focus on root development and soil preparation.
Keep the soil loose, water consistently, and mulch lightly so roots can spread fast. You’ll notice stronger growth each year as plants settle in, fill out, and start blooming with more confidence.
Can I Plant Perennials in Containers?
Yes, you can plant perennials in containers, and you’ll enjoy flexible, space-saving growth. Choose a pot with drainage, use quality potting mix, and match plants to your sunlight.
Container gardening lets you move pots for better conditions, but you’ll need consistent watering and seasonal feeding. Good perennial care means checking roots, renewing soil, and protecting pots from extreme heat or cold.
Which Perennials Bloom All Summer?
You’ll want bright, reliable bloomers that keep your garden humming like a busy bee. Coneflowers, daylilies, black-eyed Susans, coreopsis, and catmint are summer favorites that can flower for weeks, even months.
Check each plant’s blooming schedule, because some rebloom if you deadhead spent flowers. You can also try shasta daisies, salvias, and blanket flowers for nonstop color.
With the right mix, you’ll enjoy blooms from early summer through frost.
How Often Should I Divide Mature Perennials?
You should divide mature perennials every 3 to 5 years, or sooner if they crowd out, bloom less, or develop weak centers. Use clean division techniques in spring or fall, and water them well after replanting to protect plant health.
If a clump still flowers strongly and fills its space nicely, you can wait longer. Watch each plant closely, because different species need different timing and care.
Conclusion
You’ve done the hard work, but your perennials aren’t finished yet. They’re just beginning.
In the days ahead, watch for fresh growth, stronger roots, and the quiet shift from planting to thriving. Keep watering, keep tending, and keep noticing the small signs nature gives you.
Because what starts as a simple hole in the soil can become a season of color, resilience, and return. And if you stay patient, planting perennials will surprise you.