How to Repot Indoor Plants in 5 Easy Steps
If you’ve ever struggled with indoor plants that seem to outgrow their pots or look a little sad, you’re not alone. Many people find repotting intimidating or messy, but it doesn’t have to be that way.
With the right approach, repotting can actually be a simple and rewarding process that helps your plants thrive. How to Repot Indoor Plants.
Choose a pot 1 to 2 inches wider than the old one, and make sure it has drainage holes and fresh potting mix. Lightly water the plant, tilt the pot, and gently ease it out without damaging roots.
Loosen circling roots, trim any dead ones, and refresh the soil. Set the plant at the same depth, then water well and let it drain.
With a few more tips, you can make repotting even easier.
Key Takeaways
- Choose a slightly larger pot with drainage holes, and gather fresh potting mix and repotting tools.
- Water the plant lightly, then gently loosen and remove it without damaging roots.
- Tease apart bound roots, trim any dead ones, and shake off excess old soil.
- Place the plant at the same depth in the new pot, then fill around it with fresh mix.
- Water thoroughly, let excess drain, and monitor for recovery or stress over the next few days.
Choose the Right Pot and Repotting Supplies
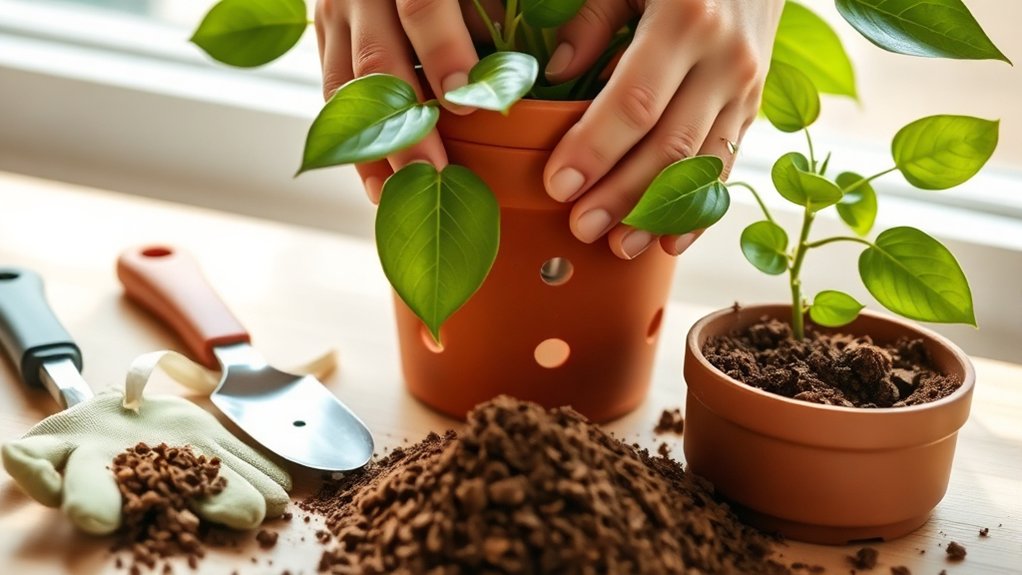
Start by choosing a pot that’s just 1 to 2 inches wider than the current one, with drainage holes to keep excess water from pooling around the roots. You want a size that gives the roots room to grow without leaving too much wet soil behind.
Check the pot’s weight and material too; terra cotta dries faster, while plastic holds moisture longer. Pick quality potting materials before you begin, including fresh potting mix, a saucer, gloves, and a small trowel.
If your plant likes extra airflow, add perlite or bark to the mix. Keep drainage considerations front and center, because standing water can lead to root stress and rot. Before you repot, wipe the new container clean and make sure every supply is within reach.
When you prepare well, you make the whole repotting process smoother, faster, and much less messy for both you and your plant.
Remove the Plant Without Damaging the Roots

Now that you’ve got the right pot and supplies ready, gently free the plant from its current container. Start by watering it lightly if the soil feels dry, since damp soil slips out more easily and helps protect root health.
Tilt the pot on its side and support the stems near the base, then tap the container’s edges to loosen the root ball. If the plant still resists, squeeze a flexible pot or run a thin blade around the inside rim to break the grip.
Pull slowly and steadily, never yanking the foliage, because sudden force can snap roots. Once the plant slides out, hold it at the base and keep the root ball intact.
Check the roots as you work, but save major cleanup for later. If you notice the plant is very tight in its pot, that’s a sign your repotting timing is right and you should move ahead carefully.
Loosen Bound Roots and Refresh the Soil

Gently tease apart any roots that are circling the root ball, using your fingers or a clean tool to loosen them without tearing healthy growth. If roots stay tightly packed, they can keep expanding in circles and limit root health.
Work patiently around the edges, gently separating compacted strands so they can spread into fresh mix more easily. Shake off loose, old soil, but don’t strip every bit away; a little remaining soil helps reduce shock.
Inspect the root system as you go, and trim any dead, blackened, or mushy pieces with sterilized scissors. Then add fresh potting mix around the roots to replace depleted soil nutrients, giving the plant a cleaner, better aerated base.
Break up large clumps so the new soil fills gaps evenly and holds moisture without becoming dense. This simple refresh supports stronger growth and helps your plant settle into its new container with less stress and better access to food.
Repot the Indoor Plant at the Right Depth
Once the roots are loosened and the fresh mix is ready, place the plant in the new pot so the root ball sits at the same depth as before. Check the rim of the old soil line and match it in the new container.
If the plant rides too high, roots may dry out and wobble; if it sits too low, stems can stay damp and suffer. Add or remove a little mix under the root ball until the root depth looks even with the surrounding soil.
Then fill around the sides, gently firming as you go so the plant stands upright without packing the mix too tightly. Keep the crown exposed and leave a small space below the pot rim for easy care.
This careful placement supports plant health by giving roots stable contact with the medium and enough oxygen to grow well. Take a final look from the side to confirm the plant sits centered, level, and secure.
Water the Plant and Monitor Recovery
Water the plant thoroughly after repotting so the new mix settles around the roots and air pockets close. Let excess water drain freely, then empty the saucer so roots don’t sit in runoff.
Water thoroughly after repotting, then let excess drain so roots settle without sitting in runoff.
In the next few days, check soil moisture with your finger and adjust watering based on plant hydration needs, not a fixed schedule. Most plants need slightly less water right after repotting because damaged roots can’t absorb as quickly.
Place the pot where it gets the right light and stable temperatures, then watch for recovery signs like firmer leaves, fresh growth, and improved posture. If you see yellowing, drooping, or soggy soil, pause watering and inspect drainage.
Give the plant time to settle; stress is normal after transplanting. With steady care, you’ll help it rebuild roots and return to healthy growth.
Frequently Asked Questions
How Often Should Indoor Plants Be Repotted?
You should repot indoor plants every 1 to 2 years, but you’ll also want to check their root health and pot size. If roots circle the pot, poke out drainage holes, or the plant dries out too fast, it’s time.
Faster-growing plants may need repotting yearly, while slow growers can wait longer. Renewing the soil and giving roots more room helps your plant stay healthy and grow well.
Which Indoor Plants Dislike Frequent Repotting?
You’ll find many indoor plants dislike frequent repotting, especially snake plants, ZZ plants, pothos, peace lilies, hoyas, and most succulents. Their succulent preferences favor snug pots, and too much disturbance can slow growth or stress them.
Instead, repot only when roots circle the container or root health declines. If you see stunted growth, yellowing, or drying soil too fast, then it’s time to move them gently.
Can I Repot During Flowering Season?
Yes, you can repot during flowering season, but only if you really need to. You’ll likely cause some flowering stress and root disturbance, which can make blooms drop or slow growth.
If the plant looks healthy and the pot still fits, wait until after flowering. If roots are crowding the pot or soil is failing, repot gently and keep watering steady afterward.
What Signs Show a Plant Needs Repotting?
You’ll spot the warning signs fast: roots circling the pot, slipping out of drainage holes, and growth stunting that feels like a plant crying for mercy.
If the soil dries out too quickly or stays soggy, you’re likely facing root bound conditions, soil depletion, pot size mismatch, drainage issues, and plant stress.
When your plant looks cramped, thirsty, or tired, it’s shouting that it needs a bigger home.
Should I Fertilize Immediately After Repotting?
Not right away. You should let your plant settle before you fertilize because fresh roots can burn easily after repotting. Wait about 2 to 4 weeks unless the potting mix already includes nutrients.
For repotting timing, focus on watering well and bright, indirect light first. When you do feed, choose gentle fertilizer types, like a balanced liquid at half strength, so you support growth without stressing the plant.
Conclusion
Now you’ve got the basics to repot your indoor plants with confidence. By choosing the right pot, protecting the roots, rejuvenating the soil, and settling everything at the right depth, you give your plant a fresh start.
Water it well and keep an eye on how it recovers. With a little care, your plant will bounce back like a runner after a short break, ready to grow stronger and healthier in its new home.
Repotting indoor plants is a simple way to boost their growth and keep them thriving. With these easy steps, your plant’s new beginning will be a success.