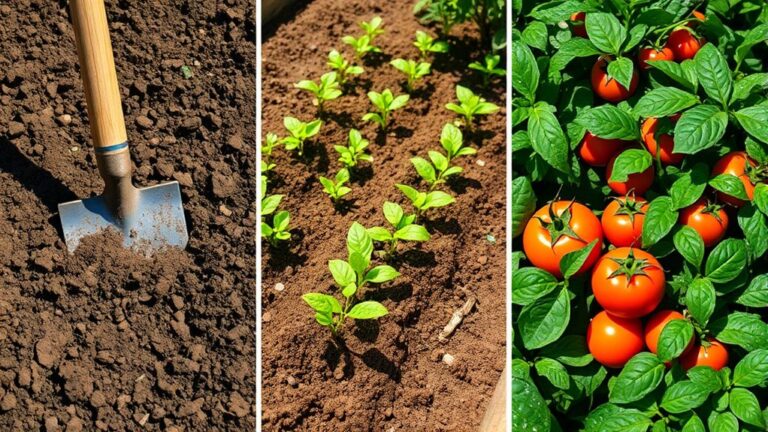
How to Create a Garden Bed in 3 Steps
Creating the perfect garden bed can feel overwhelming, especially if you’re not sure where to start or how to make your plants thrive. You’re not alone—many people struggle with choosing the right spot and preparing the soil just right.
Luckily, with a few simple steps, you can create a garden bed that’s healthy and ready to flourish.
To create a garden bed in 3 steps, start by picking a sunny spot with good drainage and enough room for airflow.
Next, clear the area, shape the bed, and mix in compost to enrich the soil.
Finally, plant your flowers, herbs, or vegetables, water them deeply, and add mulch to hold moisture and block weeds.
With a few simple choices, you can build a healthy bed that’s ready to thrive, and there’s more to fine-tune.
Key Takeaways
- Choose a sunny, well-drained spot with enough room for air circulation and easy access.
- Gather tools and materials, including a shovel, rake, compost, topsoil, mulch, gloves, and a bucket.
- Mark the bed shape, then clear grass, weeds, rocks, and debris down to bare ground.
- Spread compost over the bed and mix it into the top 6 to 8 inches of soil.
- Plant, water thoroughly, and apply 2 to 3 inches of mulch while leaving space around stems.
Choose the Best Garden Bed Location

Start by picking a spot that gets plenty of sunlight, since most vegetables and flowers need at least six to eight hours a day. Watch the path of the sun across your yard and choose an area with steady sunlight exposure, not deep shade from trees or fences.
Choose a spot with plenty of sun, where vegetables and flowers can soak up six to eight hours daily.
You should also check drainage considerations after rain; water shouldn’t pool where roots will grow. A slightly raised area or a slope that sheds excess water often works well. Look at nearby structures, too, because walls, sheds, and overhangs can block light or create hot spots.
Leave enough room for air to move freely around the bed. Finally, test the soil quality before you commit. Healthy soil should feel loose, hold moisture without turning soggy, and drain well.
If the ground seems compacted or poor, you can improve it later, but a smart location makes every other step easier.
Gather Your Tools and Materials
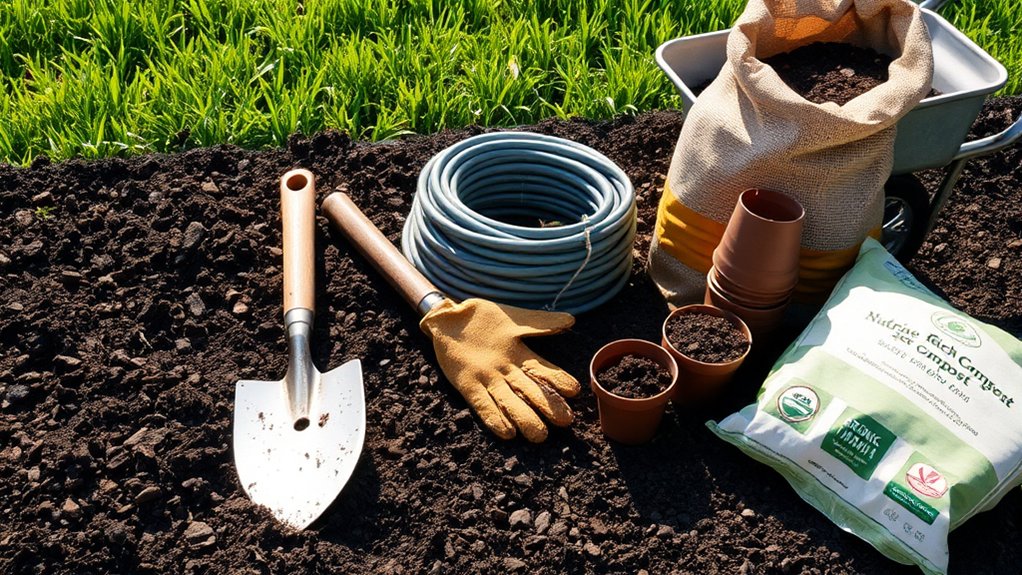
Before you begin digging, gather the basic tools and materials you’ll need so the job goes smoothly: a shovel or spade, a garden rake, a hoe, a tape measure, gloves, and a wheelbarrow or sturdy bucket for hauling soil and compost. Check each item for damage, then choose tool types that fit your space and strength. Good material selection helps you work faster and limits extra trips.
- Shovel or spade for cutting and lifting soil
- Rake for smoothing the bed surface
- Hoe for loosening weeds and breaking clods
- Gloves and a bucket for cleanup and hauling
You’ll also want compost, topsoil, and mulch ready before you start. Keep everything within reach so you can move efficiently from one task to the next. When your tools are organized, you can focus on building a healthy bed without interruptions or wasted effort.
Mark the Garden Bed Shape
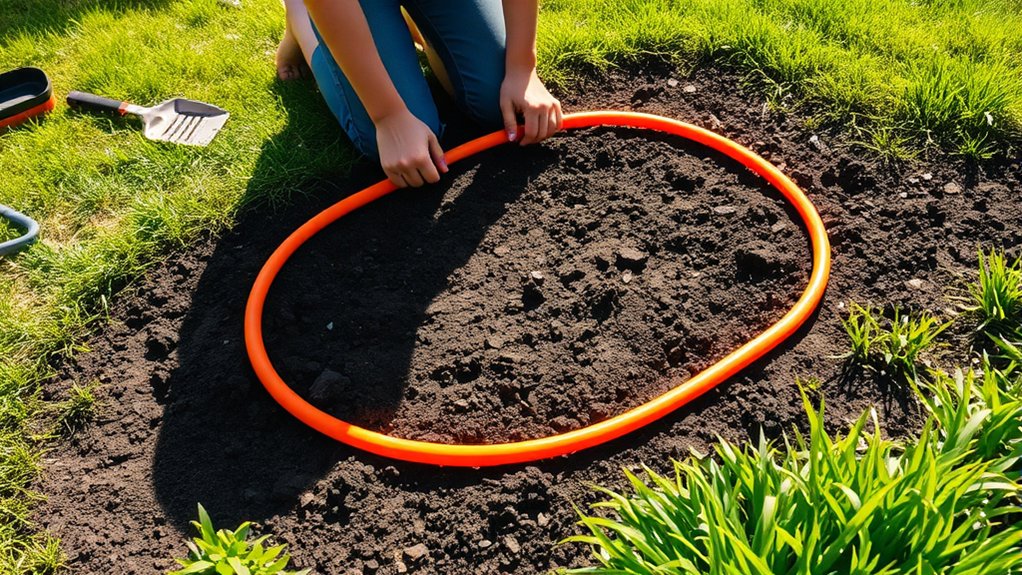
Start by picking the outline for your garden bed. Do you want clean, straight edges or gentle curves? Use marking tools like stakes, string, or even a garden hose to trace the shape on the ground. As you go, check the curves to make sure they look smooth and measure true before you start digging.
Choose Bed Outline
Pick the bed outline by marking the shape directly on the ground so you can see how much space it will take up. You can choose from simple bed shapes or more flowing curves, depending on your yard and planting goals.
Think about how the outline fits paths, fences, and nearby features. Different material options, like stone or wood borders, can influence the look, but the shape should still suit your space.
- Keep the outline easy to reach from every side.
- Match the shape to the plants you’ll grow.
- Leave room for walking and watering.
- Check that the bed feels balanced in the landscape.
When you’re happy with the outline, step back and look at it from several angles. This helps you spot awkward edges before you move on.
Use Marking Tools
Once you’ve settled on the bed outline, use marking tools to trace it clearly on the ground. You can lay a garden hose, rope, or flexible edging along the shape, then adjust it until the line fits your garden layout.
For straighter edges, snap chalk lines or use stakes and string. For softer curves, move the hose slowly and keep the arc smooth. These marking techniques help you see the full bed before you dig, so you can spot awkward corners or gaps early.
Walk around the outline from different angles and make small changes until it feels balanced. When you’re happy, mark the line with flour, spray paint, or a garden hoe so the shape stays visible while you work.
Measure Curve Accuracy
Check the curve from more than one angle to make sure the bed shape flows naturally. Step back, walk the perimeter, and compare the line against your plan. Use curve measurement techniques such as a flexible hose, string, or garden marker to see whether the arc stays smooth.
You’ll want to adjust tight bends and uneven dips before you dig, because small errors show up later. View the outline from the house, check spacing along the full edge, match the curve to garden design principles, and re-mark spots that look too sharp.
If the shape feels balanced, trust your eye and confirm the measurements again. A clean curve helps you build a bed that looks intentional, fits the space, and supports easier planting.
Clear the Site Completely
Start by stripping the area down to bare ground so your garden bed has a clean foundation. This site preparation step helps you see every obstacle before you move ahead. Pull up grass, weeds, rocks, and any edging that blocks the bed shape.
Use a shovel or spade for stubborn roots, and make sure your soil removal is thorough along the entire outline.
| Item | Action | Result |
|---|---|---|
| Grass | Dig it out | Clean edge |
| Weeds | Remove roots | Less regrowth |
| Rocks | Pick them up | Easier digging |
| Debris | Haul it away | Open space |
| Stumps | Cut and pry | Clear site |
Check the area again after you finish. If you leave even a small patch behind, it can spread fast. When the surface looks bare and even, you’re ready for the next step.
Enrich the Soil With Compost
Spread a generous layer of compost over the cleared bed to give your soil a nutrient boost. Choose quality compost types like finished yard waste, well-rotted manure, or leaf mold. This way, you add balanced soil nutrients without stressing young roots. Aim for a 2- to 3-inch layer, then spread it evenly across the surface.
Spread a generous layer of compost to nourish the soil and give young roots a healthy start.
Use a garden fork or shovel to work it into the top 6 to 8 inches of soil where plants can access it quickly. As you mix, break up clumps and remove any lingering debris.
- Feed beneficial microbes that improve soil structure
- Help sandy soil hold moisture longer
- Loosen heavy soil for easier root growth
- Support stronger seedlings and healthier harvests
If your bed feels poor or tired, add a little more compost, then smooth the surface. You’re building a richer, more resilient planting base now, and that effort pays off all season.
Install Edging Around the Bed
Once your soil is amended and smoothed, install edging around the bed to define its shape and keep materials in place. Choose edging materials that suit your style, budget, and maintenance goals. Then mark the border with a hose or string.
Dig a shallow trench, set the edging firmly, and backfill soil so the top edge stays visible. Good installation techniques help prevent mulch from spilling and keep the bed crisp through rain and weeding.
| Edging material | Best use |
|---|---|
| Metal | Clean, modern lines |
| Stone | Natural, durable borders |
| Wood | Warm, flexible curves |
| Brick | Classic, sturdy definition |
Check that each section sits level, then tamp the soil around it. When you work carefully, you create a finished frame that protects your bed and makes the whole garden look intentional.
Plant Your Flowers, Herbs, or Vegetables
Now that your bed is edged and ready, plant your flowers, herbs, or vegetables according to each plant’s spacing and sun needs. Match flower selection to your garden design, and choose vegetable varieties and herbs that fit your soil types and climate.
Group companions together for better companion planting, and leave room for airflow so plants grow well. Add a light layer of organic fertilizers if your soil needs a boost, but don’t crowd roots.
Group companion plants for better growth, and leave space for airflow and healthy roots.
Pick seedlings or seeds suited to seasonal planting. Mix herb benefits with blooms for fragrance, color, and use. Place taller plants where they won’t shade shorter ones. Watch for pests and adjust pest management early.
After planting, use gentle watering techniques to settle the roots without washing away soil. Keep checking moisture, spacing, and plant health as your bed fills in, and you’ll set the stage for a thriving, balanced garden bed.
Water the New Bed Thoroughly
After planting, give the new bed a deep, even watering so the soil settles around the roots. Use a gentle spray or a soaker hose to soak the entire area without washing away the soil.
Check the top few inches with your finger; if it feels dry, water again until the root zone is fully damp. Good watering techniques help new plants establish faster and reduce transplant shock.
Aim for steady soil moisture, not soggy conditions, because roots need both water and air to grow well. Water in the early morning so leaves dry quickly and the bed can absorb moisture before the day heats up.
If the water runs off, pause for a few minutes, then continue in short cycles so it can sink in. Watch your plants over the next week, and adjust your schedule based on weather, plant type, and how quickly the soil dries out.
Mulch to Lock in Moisture
Choose an organic mulch, like shredded bark or straw, to help hold moisture in your new garden bed. Just spread it in an even layer around your plants, but make sure to keep it a little away from the stems. It’s a good idea to check it often and add more as needed to keep the soil nice and protected.
Choose Organic Mulch
A good organic mulch helps your garden bed hold onto moisture, keeps soil temperatures steadier, and suppresses weeds. When you choose among mulch types, focus on materials that break down and feed your soil. You’ll get strong organic benefits from options like bark, straw, shredded leaves, and composted wood chips.
Bark lasts longer in busy beds. Straw suits vegetable gardens well. Shredded leaves add nutrients fast. Wood chips work best around perennials.
Pick what matches your plants and climate, then buy enough to cover the space you’ve prepared. Organic mulch also supports earthworms and improves soil structure over time. By choosing wisely, you’ll protect moisture, reduce watering needs, and build healthier ground for your garden bed season after season.
Apply Even Layer
Spread the mulch in a thin, even layer across the bed to help seal in moisture and protect the soil. Keep the depth around 2 to 3 inches so you don’t smother young plants or block airflow.
During soil preparation, rake the surface smooth first, then tuck mulch around stems without piling it against them. This helps the ground hold water longer and reduces temperature swings.
Leave a small gap at the base of each plant so you avoid rot and let bed drainage work properly. If you see bare patches, fill them lightly for consistent coverage.
An even layer also slows weed growth and gives your garden a neat, finished look while supporting healthier roots throughout the growing season.
Replenish As Needed
Check your mulch layer regularly and top it up when it starts to break down or thin out, since fresh mulch helps lock in moisture and keep soil temperature steady. You’ll protect roots, cut weeds, and reduce watering needs with a simple refresh.
Spread 2 to 3 inches after rain or wind exposes soil, and keep mulch a few inches from stems.
- Inspect bare spots weekly
- Add composted mulch or other soil amendments
- Reapply after seasonal planting changes
- Fluff compacted areas for better airflow
As the material decomposes, it feeds the bed and improves structure. If you grow heavy feeders, pair mulch with targeted soil amendments so nutrients stay available.
During seasonal planting, replace any lost cover right away so your bed stays healthy, moist, and ready for strong growth.
Keep the Garden Bed Maintained
Keep your garden bed thriving by staying on top of regular maintenance. You’ll protect your plants when you water deeply, pull weeds early, and check mulch levels each week. Prune damaged growth so air moves freely, and inspect leaves for trouble before it spreads.
Good pest management starts with quick checks and healthy soil. Seasonal maintenance matters too, since your bed changes with weather and plant growth.
| Task | Why it helps |
|---|---|
| Water deeply | Encourages strong roots |
| Weed regularly | Cuts competition |
| Refresh mulch | Holds moisture |
| Inspect pests | Catches issues fast |
| Prune plants | Improves airflow |
You should also rotate crops if possible and add compost when the soil looks tired. In cooler months, clear dead stems and cover exposed soil. During hot spells, watch for stress and adjust care.
A little steady attention keeps your garden bed productive, neat, and resilient all year.
Frequently Asked Questions
How Deep Should a Garden Bed Be for Root Vegetables?
For root vegetables, you should make your garden bed at least 12 to 18 inches deep so roots can grow straight and strong. If you’re growing carrots, beets, or radishes, deeper soil helps match their root depth and improves harvest quality.
You’ll also want to plan proper vegetable spacing because crowded plants can compete below ground. Add loose, stone-free soil, and you’ll give your crops the best chance to thrive.
What Vegetables Grow Best in Partial Shade?
You’ll find that partial shade suits leafy crops best, and that’s easy to picture: a garden bed location under dappled light often grows lettuce, spinach, kale, arugula, chard, and scallions well.
To test the theory, imagine sunlight filtering through trees and compare it with harsh noon sun. Those shade-loving vegetables usually stay tender and bolt less.
You can also try beets and radishes for reliable harvests.
How Do I Test My Soil pH at Home?
You can test your soil pH at home with a simple soil testing kit or pH strips. Mix a small soil sample with distilled water, then dip the strip or follow the kit’s directions.
Compare the color change to the chart to find your pH level. For better accuracy, take samples from a few spots in your garden and test them separately.
Aim for slightly acidic soil for most vegetables.
When Is the Best Time to Build a Raised Garden Bed?
You’ll usually get the best results when you build your raised garden bed in late winter or early spring, just before planting season. That timing lets you choose the best materials and set it in ideal locations while the weather’s mild.
Coincidentally, the same weekend you’re clearing your yard often gives you the perfect chance to start. You’ll work more comfortably, and your bed’ll be ready when seedlings need it.
How Can I Keep Pests Out of My Garden Bed?
You can keep pests out by combining organic pest control with natural deterrents. Add companion planting like marigolds or basil, and set pest traps for crawling bugs.
Invite beneficial insects by planting flowers they love, and install garden barriers such as row covers or copper tape. You’ll protect your bed best when you check plants often, remove hiding spots, and act early before pests spread.
Conclusion
Now you’re ready to turn that bare patch into a garden bed that practically bursts with life. By choosing the right spot, clearing the area, and enriching the soil, you’ve set your plants up for success.
Add your flowers, herbs, or vegetables, give them a deep drink, and mulch to help hold moisture. Keep up with simple maintenance, and your garden bed will thrive like it’s got a magic spell on it.
With these steps, your garden bed will become a vibrant, flourishing space that brings joy and beauty to your outdoor area.