Garden Layout Ideas for a Simple How-To Guide
If you’ve ever tried to plan a garden, you know how overwhelming it can be to figure out the best layout that fits your space and needs. You’re not alone—many people struggle with organizing their garden so it looks great and grows well.
Finding simple, effective garden layout ideas can make all the difference in creating a space that’s both beautiful and productive.
Start by choosing a layout that fits your space, like straight rows, raised beds, or container groupings. Measure the area, note sunlight, slopes, fences, and trees, then sketch beds, paths, and focal points.
Keep paths wide enough for easy weeding and harvesting, and group plants by height and needs. Place water access nearby, use mulch or drip irrigation, and leave room for airflow.
With a few smart choices, your garden can stay simple and productive, and more ideas are just ahead.
Key Takeaways
- Measure your space first, noting sunlight, shade, slopes, fences, and other obstacles.
- Sketch beds, paths, and focal points with enough room for comfortable movement and harvesting.
- Choose a layout style: straight rows, raised beds, curved beds, or container groupings.
- Group plants by height, type, and companion needs for better growth and easier care.
- Plan watering, mulching, and wide access paths to simplify maintenance and reduce crowding.
Choose Your Garden Layout Style

Before you plant a single seed, choose a garden layout style that fits your space, climate, and how you want to use it. You can keep things simple with straight rows, which make planting, weeding, and harvesting easy.
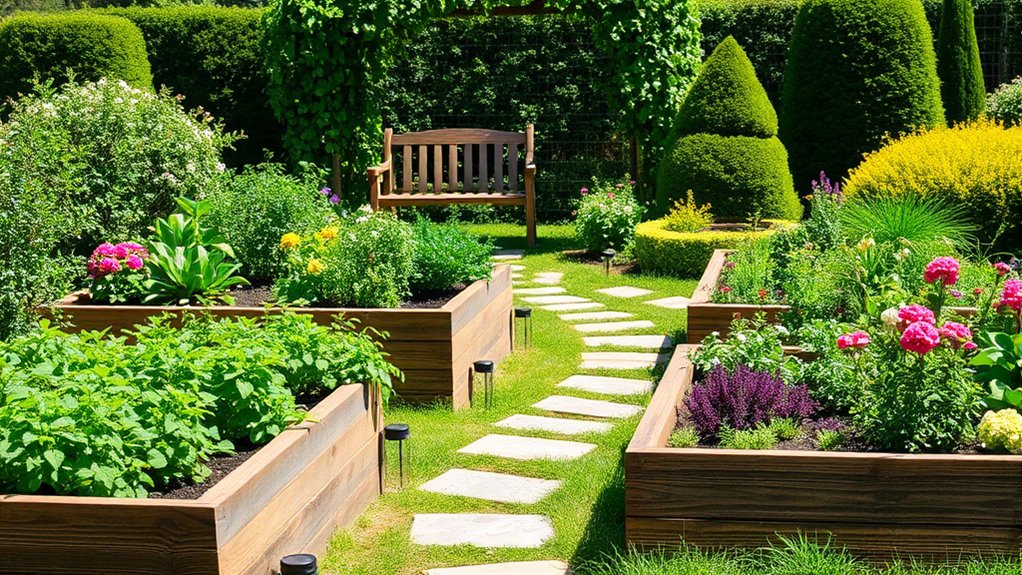
If you want a more creative look, try curved beds or geometric patterns that match your garden themes. Raised beds work well when you need structure, better drainage, and easier access.
Container groupings suit patios, small yards, and renters who want flexibility. Cottage-style layouts feel relaxed and lush, while formal designs give you clean lines and balance.
Container groupings bring flexibility, while cottage and formal layouts create very different garden moods.
Mixed layout styles can also work if you grow flowers, herbs, and vegetables together. Pick one approach first, then shape it around your habits and goals.
When your layout supports how you garden, you’ll save time, reduce stress, and enjoy the space more.
Measure Your Garden Layout and Sunlight

Grab a tape measure and map out your garden space so you know exactly what you’re working with. Start by checking the length and width of the area, then note any slopes, fences, trees, or walls that may affect planting. Use simple measuring tools, like a tape, stakes, and string, to mark your boundaries clearly.
Next, watch how sunlight shifts through the day so you can match crops to the right spots. Pay attention to morning light, midday heat, and afternoon shade, because sunlight angles change seasonally.
- Measure every edge.
- Record shade patterns.
- Mark sunny zones.
- Note obstacles and uneven ground.
Keep your notes handy, and compare them with plant needs before you move on. Accurate measurements help you avoid crowding, improve spacing, and make better use of every square foot.
Sketch Beds, Paths, and Focal Points
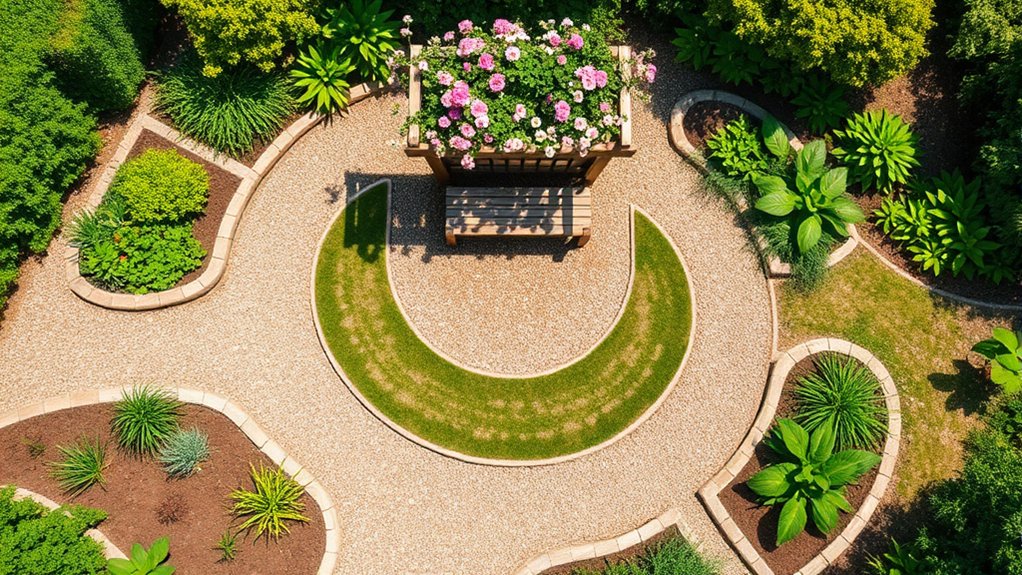
With your measurements in hand, sketch the main beds, paths, and focal points directly onto your garden plan. Use a pencil so you can adjust lines as your ideas shift. Mark each bed’s shape and orientation to match light, wind, and access.
Then draw paths wide enough for comfortable movement and wheelbarrow turns, keeping them direct and practical. As you place focal point features, think about where your eye naturally lands from the house, gate, or patio.
Draw paths wide enough for easy movement, and place focal points where the eye naturally lands.
A small bench, trellis, birdbath, or specimen plant can anchor the design without crowding it. Balance open space with planted areas so the layout feels organized, not cramped. If you notice awkward corners, soften them with curved edges or a narrow border bed.
Keep the sketch simple, clear, and easy to read, because this draft will guide every next decision you make in the garden.
Plan a Simple Raised-Bed Layout
Start by picking raised-bed sizes you can easily reach from both sides. That way, planting and harvesting won’t be a hassle. Also, make sure the paths between the beds are wide enough for a wheelbarrow or just your own footing. You want to be able to get around comfortably without stepping on your plants. When you find the right balance between bed size and pathway placement, you’ll end up with a simple layout that works great and feels open.
Bed Size Planning
A simple raised-bed layout works best when you size each bed for easy reach and efficient planting. You can keep beds narrow enough to access from both sides. This helps you plant, weed, and harvest without stepping in the soil.
Match bed depth to your crops and your soil type so roots have room and drainage stays steady.
- Choose widths you can reach easily.
- Use lengths that fit your yard.
- Set bed depth for the plants you grow.
- Group similar crops in each bed.
If you grow shallow-rooted greens, you don’t need extra depth. For tomatoes or carrots, give them more room below. Keep your layout simple, repeatable, and easy to expand later.
Pathway Placement Tips
Keep your pathways wide enough to move a wheelbarrow, kneel, and turn comfortably without crowding the beds. Place main paths where you’ll walk most often, then keep secondary paths short and direct so you don’t waste growing space.
Aim for straight lines in a simple garden, or use gentle curves if they improve access and drainage. Choose pathway materials that stay stable, drain well, and resist mud, such as gravel, mulch, pavers, or stepping stones.
Match your pathway designs to your bed layout, sunlight, and watering needs so you can reach every plant easily. Leave enough room at corners and intersections to avoid scraping foliage or stepping into beds. Good placement helps you work faster, reduces compaction, and keeps the whole garden neat.
Arrange Plants by Height and Spread
When you arrange plants by height and spread, you create a layered garden that lets every plant get the light and space it needs. Start with tall growers at the back or center, then move down to midsize and low plants for strong height layering. Use spacing techniques that match each plant’s growth habits and spread considerations, so nothing crowds nearby roots or blocks sunlight exposure.
Thoughtful plant combinations build visual balance, while color harmony keeps the bed lively.
- Place tall, upright plants first.
- Add medium plants to bridge layers.
- Set low plants along edges.
- Leave room for seasonal adjustments and maintenance needs.
Check mature sizes, not just nursery pots, and adjust as plants fill in. You’ll keep the design tidy, reduce pruning, and help each plant perform at its best.
Group Vegetables, Herbs, and Flowers
You can group vegetables, herbs, and flowers together to make your garden work harder and look better. Companion planting is great because it helps boost growth, keeps pests away, and makes the most of each bed’s space.
If you mix different plant types, you’ll add color and texture, which creates a garden that’s not only practical but also really inviting. It’s a simple way to get more out of your garden while making it look amazing.
Companion Planting Benefits
Companion planting can make your garden work harder for you by pairing vegetables, herbs, and flowers that support one another. You’ll see better plant pairings when basil shelters tomatoes, marigolds aid pest control, and beans boost nutrient sharing near corn. This mix creates growth synergy, so each plant performs better than it would alone.
- Use crop rotation to keep soil healthier.
- Mix herbs with crops for biodiversity benefits.
- Tuck flowers in borders for pollinator attraction.
- Arrange close neighbors for space efficiency.
These combinations also help you reduce chemical sprays and improve harvest quality. By choosing companions with clear jobs, you’ll build a stronger, more resilient garden with less effort and more yield.
Space by Plant Type
After pairing plants for shared benefits, organize your garden by plant type so each group gets the right conditions. You can set aside one bed for vegetables that need richer soil, another for herbs that prefer leaner, drier ground, and a third for flowers that support pollinators and fill open edges.
This setup makes watering, feeding, and pruning easier because you’re not guessing what each section needs. It also helps you check plant compatibility before you place crops too close together. Keep similar heights and root depths together so they don’t compete as much.
As you plan, leave room for seasonal rotation, so you can swap families later and reduce pests and disease. Simple grouping keeps maintenance clear and your layout efficient.
Mix Color and Texture
Mixing color and texture brings your garden to life while still keeping it practical. You can group vegetables, herbs, and flowers so each bed looks inviting and stays useful. Try these ideas:
- Pair leafy greens with bright marigolds for bold color combinations.
- Place feathery dill beside sturdy kale for texture contrasts.
- Mix purple basil with red lettuce to guide the eye.
- Edge beds with compact flowers to soften straight rows.
You’ll make harvesting easier when you cluster plants with similar needs, but you’ll also create visual rhythm. Repeat colors across the space, then vary leaf shapes and bloom sizes. This balance helps your layout feel organized, lively, and easy to manage all season.
Set Up Easy Watering Access
Place your hose, spigot, and watering cans where you can reach them without weaving through beds or dragging equipment across the garden. Put your main water source close to the areas that need the most attention, so you can water quickly before the soil dries out.
Good hose accessibility also makes it easier to check plants often and adjust for hot, windy weather. If you want a low-effort option, add drip irrigation along rows or around containers. It delivers water right to the roots and supports water conservation.
Easy hose access lets you monitor plants closely, and drip irrigation conserves water by delivering it right to the roots.
Mulch around plants after you water to improve moisture retention and reduce how often you need to irrigate. Use short hose runs, simple connectors, and a compact storage spot so setup stays neat and fast.
When you plan watering access into the layout from the start, you save time, reduce strain, and keep every bed easier to maintain throughout the season.
Leave Space for Weeding and Harvesting
Leave enough room between beds and rows so you can weed, prune, and harvest without crushing nearby plants. You’ll work faster when each path lets you kneel, reach, and turn tools comfortably. Good spacing also helps air move through foliage, which reduces mess and makes cleanup easier.
Use practical weeding techniques like hand pulling after rain or slipping a hoe through loose soil. Then match your harvest plans to the beds, so ripe produce sits near the edge and you can pick it quickly.
- Keep paths wide enough for your shoulders.
- Leave access at both ends of each row.
- Place tall crops where they won’t block your reach.
- Organize harvesting schedules so you visit beds in order.
When you plan for access first, you save time, avoid damage, and keep your garden neat all season.
Try Small-Space Garden Layout Ideas
If you’re working with a tight yard, why not try vertical garden solutions? Growing upward helps you free up ground space. Plus, raised bed arrangements are great for organizing plants neatly and making the most of every square foot.
When you combine these ideas, you get a productive garden without crowding your space. It’s all about working smart with what you’ve got!
Vertical Garden Solutions
When floor space is tight, vertical garden solutions let you grow more without crowding your yard, patio, or balcony. You can use space-saving techniques to turn fences, railings, and blank walls into productive growing areas. Try these ideas:
- Mount wall-mounted planters for herbs and compact flowers.
- Hang stacked pockets for strawberries or lettuce.
- Train cascading plants from shelves or trellises for a lush look.
- Install drip irrigation to keep moisture even and reduce daily watering.
You’ll also keep paths open and maintenance simple. Choose lightweight containers, secure supports well, and place sun-loving plants higher where they get better light. With a smart vertical layout, you can maximize yield, add privacy, and create a green display that feels full without taking up precious ground space.
Raised Bed Arrangements
Raised beds give you a flexible way to shape a small garden so every inch works harder. You can line them in neat rows for easy access, or cluster them in an L-shape to fit a corner. Leave narrow paths between beds so you can reach plants without stepping on soil.
Build one bed for herbs, one for quick greens, and one for deeper-rooted crops. That setup makes crop rotation simple and helps you keep the soil healthy. You can also plan seasonal planting by swapping cool-weather lettuce for tomatoes or beans as the weather changes.
If your space is tight, use square beds to divide crops clearly and maximize sunlight. With thoughtful placement, you’ll harvest more from less ground.
Avoid Common Garden Layout Mistakes
Before you map out beds and paths, it helps to sidestep the most common garden layout mistakes, because a few smart choices now can save you time, effort, and frustration later. Check soil quality first, then match plant selection to light, spacing, and water needs. Ignoring environmental factors leads to weak growth and extra garden maintenance.
Smart garden layouts start with soil, sunlight, and spacing—small choices now prevent bigger problems later.
- Plan for seasonal planting so you don’t crowd spring crops with summer growers.
- Leave clear access for weeding, harvesting, and pest control.
- Choose irrigation methods that reach roots without soaking paths.
- Balance design aesthetics with function so beauty doesn’t block airflow or sunlight.
If you rush the layout, you’ll waste space and invite disease. Instead, sketch your garden, note shade shifts, and group plants by needs. That simple approach keeps your beds productive, easier to manage, and far less stressful all season.
Frequently Asked Questions
How Do I Choose Garden Tools for Beginners?
Choose lightweight, durable essentials like a hand trowel, pruning shears, gloves, and a watering can. You’ll want budget-friendly options that feel comfortable and fit your tasks, not every gadget in the store.
Check tool maintenance needs, too. Simple cleaning and sharpening save money. Prioritize garden safety with non-slip grips, rounded edges, and protective gloves.
Start small, then add more tools as your garden grows and your confidence builds.
What Soil Type Works Best for Container Gardens?
You’ll do best with a light, well-draining potting mix, not heavy garden soil. It holds moisture and nutrients without turning soggy, so your roots can breathe.
You can boost performance with compost, perlite, or vermiculite, and add drainage solutions like holes, mesh, or a gravel layer. In a clay pot or plastic container, the right mix feels both airy and steady. It offers soft support for plants, not a muddy trap.
How Often Should I Rotate Crops in a Small Garden?
Rotate your crops every season, or at least once a year, in a small garden. You’ll improve crop rotation, support pest management, and protect soil nutrients by moving plant families to new spots.
Plan ahead with seasonal planning so heavy feeders follow legumes or greens, not the same bed. If space is tight, rotate by section or container.
Even small shifts help keep your soil healthier and your harvest stronger.
Which Flowers Attract Pollinators to a Vegetable Garden?
You can plant pollinator friendly flowers like zinnias, calendula, cosmos, marigolds, borage, and sunflowers to draw bees, butterflies, and hoverflies into your vegetable garden. These blooms keep nectar coming through the season and help with attracting beneficial insects that support healthy crops.
Tuck them along borders, between beds, or near cucumbers, squash, and tomatoes so pollinators visit often and your harvest can improve naturally.
When Is the Best Time to Start Seeds Indoors?
You should start seeds indoors 6 to 8 weeks before your last expected frost. As the saying goes, “A stitch in time saves nine,” so plan ahead and give seedlings a strong start.
Use seed germination tips like keeping soil warm and moist, and choose indoor lighting options that provide bright, steady light. You’ll help seedlings grow sturdy before they’re ready to move outside.
Conclusion
Now that you’ve mapped your beds, paths, and plants, you’re ready to turn your yard into a living patchwork quilt. Keep your layout simple, leave room to move, and make watering easy so your garden stays healthy without extra hassle.
When you start with a clear plan, you avoid common mistakes and give every plant the space it needs to thrive. Enjoy the process, and let your garden grow with you.
Remember, a well-thought-out garden layout is the key to a beautiful and manageable outdoor space. Embrace these garden layout ideas for a simple how-to guide, and watch your garden flourish.