How to Make Compost at Home in 5 Steps
If you’ve ever wanted to reduce kitchen waste and create nutrient-rich soil for your garden, you’re not alone. Many people struggle with where to start when it comes to composting at home. It can feel overwhelming, but with the right guidance, making compost is simpler than you think.
To make compost at home in 5 steps, gather greens like fruit scraps and coffee grounds plus browns like dry leaves and cardboard, keeping about two parts brown to one part green with enough water for a damp, sponge-like feel.
Next, choose a level, well-drained spot with partial sun. Build layers, bury scraps, then turn and mist the pile every week or two.
When it’s dark, crumbly, and earthy, it’s ready—and there’s more to know.
Key Takeaways
- Collect greens, browns, and water, keeping about two parts browns to one part greens for balanced composting.
- Choose a level, well-drained spot with partial sunlight and easy access to water.
- Build the pile in thin layers, starting with coarse browns and bury food scraps under browns.
- Turn the pile weekly or biweekly and keep it damp, like a wrung-out sponge.
- Compost is ready when it is dark, crumbly, earthy-smelling, and uniform throughout.
Gather Greens, Browns, and Water

Start by collecting the three basics for a healthy compost pile: greens, browns, and water. You’ll need green materials like fruit scraps, coffee grounds, and fresh grass clippings, plus brown materials such as dry leaves, shredded paper, and cardboard.
Aim for about two parts brown materials to one part green materials to keep the pile balanced and reduce odors. Add water as you build so everything feels like a wrung-out sponge, not a puddle.
Many composting myths claim composting is messy or complicated, but you can keep it simple with a bucket, pitchfork, and kitchen caddy among your composting tools. These tips help you start strong and support compost benefits like richer soil and less household waste.
Avoid meat, dairy, and oily foods for now, and mix ingredients regularly to speed decomposition and keep the pile active.
Choose the Best Spot for Home Composting

Whether you’re using a bin, pile, or tumbler, choose a spot that makes composting easy to manage. Pick a level area near your kitchen, garden, or yard path so you’ll actually use it.
Your compost location should have good drainage since standing water can slow decomposition and create odors. Aim for partial sunlight exposure—enough warmth to help microbes work, but not so much that the pile dries out too quickly.
Choose a spot with good drainage and partial sun to keep compost working efficiently without drying out.
If you can, place it close to a water source for easy moistening. Keep it accessible in every season, even when rain, snow, or heat makes outdoor chores less convenient.
You’ll also want enough room to open lids, turn material, and move a bucket or pitchfork without hassle. Avoid spots right against wooden fences or walls, and stay clear of areas where runoff could affect neighbors or plants.
A smart location makes composting simpler, cleaner, and more successful.
Build Your Compost Pile Layer by Layer
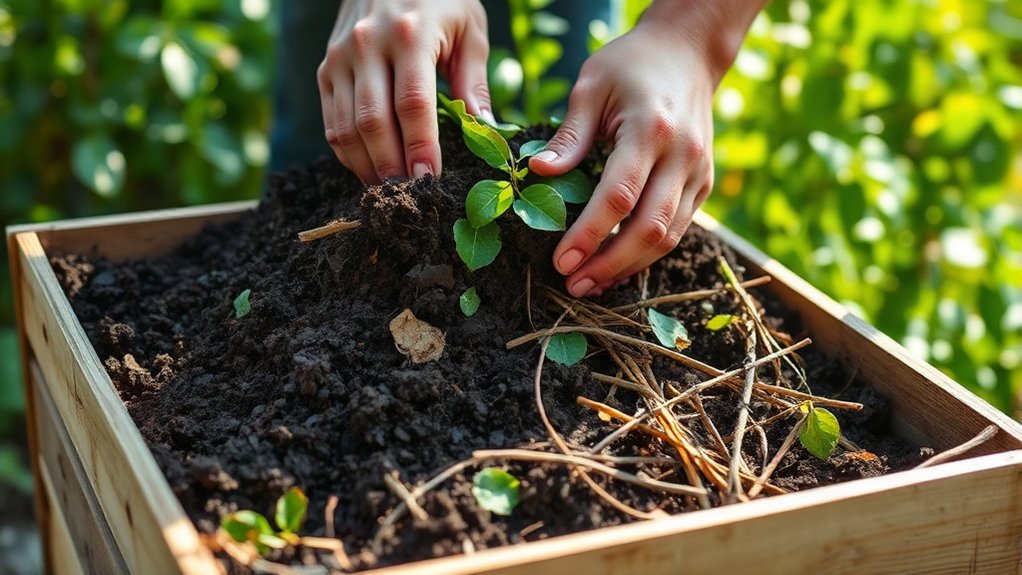
Begin with a base layer of coarse brown materials like twigs, dry leaves, or shredded cardboard to improve airflow and drainage. Then alternate layer types: add green scraps such as fruit peels, coffee grounds, and fresh clippings, followed by more browns.
This simple pattern helps you balance carbon and nitrogen, which drives the composting benefits you want. Keep each layer thin and even so decomposition starts fast without smothering the pile.
Use basic composting tools like a pitchfork, bucket, and tarp to move materials cleanly and cover the heap when needed. For pest management, bury food scraps under browns and skip meat, dairy, and oily foods.
Don’t worry about common composting myths that say layering must be perfect; your pile just needs steady variety. Watch the pile’s size and warmth for temperature monitoring, since a healthy core usually feels pleasantly hot.
Turn and Moisturize the Pile
Turn the pile every week or two to bring oxygen into the center and speed up breakdown. Use a fork, shovel, or compost aerator so you can mix outer material inward. These aeration techniques keep microbes active and prevent sour pockets from forming.
| Action | What you notice | Why it matters |
|---|---|---|
| Turn lightly | Heat spreads evenly | Boosts decomposition |
| Add dry browns | Pile feels loose | Improves airflow |
| Mist with water | Material stays damp | Supports moisture retention |
| Cover if needed | Less evaporation | Keeps the pile balanced |
Aim for the feel of a wrung-out sponge: damp, not dripping. If the pile looks dusty, sprinkle water as you turn it. If it feels soggy, add dry leaves or shredded paper and mix well. Balanced turning and watering help you maintain steady moisture retention, reduce odors, and create a healthy environment for composting.
Check When Compost Is Finished
How do you know compost is ready? You can tell by using simple compost testing and watching key compost indicators. Finished compost looks dark, crumbly, and uniform, with few or no recognizable scraps. It should smell earthy, not sour or rotten.
If you still see food pieces, fresh grass, or heat in the center, keep composting a bit longer.
Check these signs:
- Texture: Rub a handful between your fingers. It should feel soft and loose.
- Smell: Fresh, soil-like aroma means the pile has stabilized.
- Color and size: Most materials should be broken down into a rich brown mass.
If your compost passes these checks, screen it and use it in beds or pots. If it still seems active, return it to the pile and keep turning it. Patience pays off because mature compost feeds plants better and won’t steal nitrogen from soil.
Frequently Asked Questions
Can I Compost Cooked Food Scraps Safely?
Yes, you can compost cooked food scraps safely if you use the right composting techniques and manage food scrap safety carefully. You’ll want to bury them in the center of an active pile and balance them with plenty of browns.
Avoid meat, dairy, and oily foods if pests are a concern. Keep the pile hot and turned often, and you’ll reduce odors, speed decomposition, and protect your compost from attracting unwanted visitors.
What Pests Might Attract to a Compost Bin?
You might attract fruit flies, rodents, and ants to your compost bin if you leave food exposed or keep the mix too wet. You can avoid them by burying scraps, covering fresh material with browns, and sealing the bin well.
You should also avoid meat, dairy, and oily foods, since they’ll lure pests fast. Turn the pile often and keep it balanced, and you’ll make your bin far less inviting.
How Do I Compost in Winter?
You can keep composting in winter by insulating the bin, layering browns and greens, and turning it less often to preserve warmth. Use winter composting techniques like chopping scraps small and adding dry leaves or straw to help maintain heat.
Keep the pile moist, not soggy, and place it in a sheltered spot. If it freezes, don’t worry. Just keep adding materials and it’ll restart when temperatures rise.
Can I Use Compost for Potted Plants?
Yes, you can use compost for potted plants, and it can be a happy coincidence when your tired houseplants perk up after a feeding. You’ll gain nutrient benefits that help roots grow stronger and soil hold moisture better.
Use finished compost sparingly, since pots need balance, not overload. Mix a small amount into potting soil or top-dress lightly. Your potted plants will thank you with healthier growth and richer color.
How Long Does Compost Last After Finishing?
Compost can last for years if you store it dry, cool, and covered, though its nutrients slowly fade. You’ll notice compost shelf life depends on moisture and airflow, so keep it sealed but not soggy.
Compost aging is natural, and finished compost often improves for several months as it stabilizes. If it smells earthy and looks crumbly, you can still use it safely, even after a long time.
Conclusion
By following these five steps, you’ll turn kitchen scraps and yard waste into rich compost without much fuss. Start with the right mix, pick a good spot, build your pile carefully, and keep it turned and moist.
Before long, you’ll have dark, crumbly compost that feeds your garden and cuts waste. It’s a win-win, and you’ll feel good knowing you’ve made something useful from what you once threw away.
Making compost at home is a simple way to recycle and nourish your plants at the same time.