How to Grow Kale Simply
If you’ve ever tried growing kale but ended up with struggling plants or tough leaves, you’re not alone. Many people want to enjoy fresh, homegrown kale but find it tricky to get started or keep their plants thriving.
The good news? Growing kale simply is easier than you think, and with a few straightforward tips, you can enjoy a bountiful harvest without the hassle.
To grow kale simply, choose a variety you like, such as curly, Lacinato, or Red Russian. Then plant it in a sunny spot with at least six hours of light.
Give it loose, fertile soil rich in compost, keep it evenly moist, and feed it lightly for bigger leaves.
Watch for aphids and caterpillars, use row covers if needed, and harvest outer leaves when they’re 6 to 8 inches long to keep plants producing longer, with a few easy tips ahead.
Key Takeaways
- Choose a kale variety like curly, Lacinato, or Red Russian based on your climate and taste.
- Plant kale in full sun or partial shade in loose, fertile, well-drained soil with pH 6.0 to 7.0.
- Sow seeds 1/4 inch deep or transplant seedlings. Space them well and stagger plantings to enjoy longer harvests.
- Water consistently at the base, mulch to keep moisture in, and feed with balanced fertilizer as the plants grow.
- Check for pests, protect from frost, and harvest outer leaves when they’re 6 to 8 inches long.
Choose the Best Kale Variety

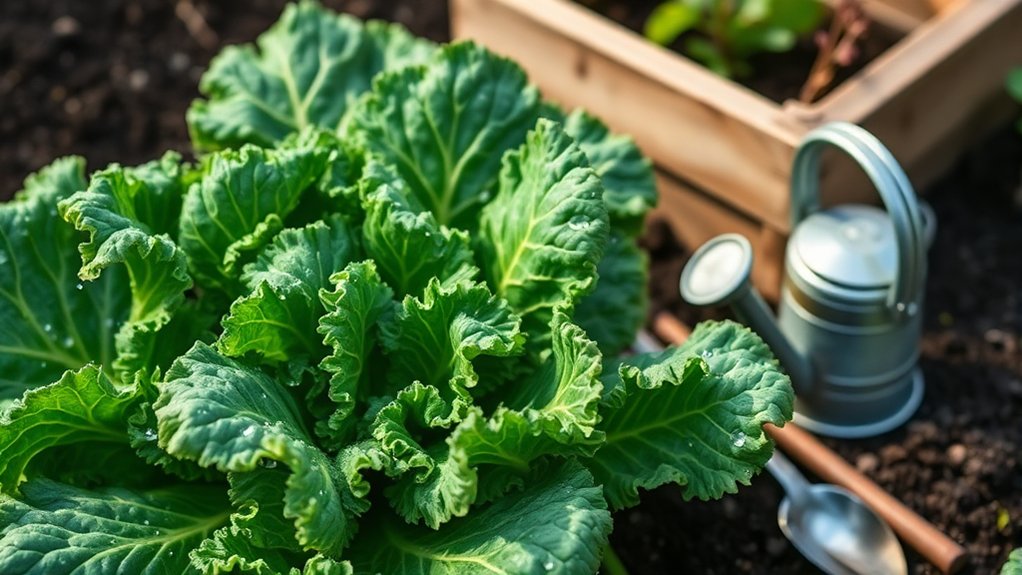
Before you plant, choose a kale variety that fits your climate and taste. You’ll find several kale varieties, each with different leaf shapes, colors, and harvest speeds. Curly types grow vigorously and often show strong pest resistance, while lacinato kale brings dark, pebbled leaves and a sweeter flavor. Red Russian kale can handle cool weather well and adds color to your garden and plate.
Think about nutritional benefits too: all kale packs vitamins, fiber, and antioxidants, but some gardeners prefer milder leaves for fresh salads, while others want sturdy greens for soups. Your cooking tips should match the variety you pick. Tender baby leaves work well raw, but tougher leaves taste best sautéed or roasted.
Seasonal planting matters as well. If your area has hot summers, pick heat-tolerant kale and sow in cooler months. When you match variety to season, you’ll get healthier plants and tastier harvests.
Pick the Right Spot for Kale

Once you’ve picked a kale variety, give it a spot with the right light and soil so it can thrive. Choose a site that meets kale’s sunlight requirements: full sun works best in cool weather, but partial shade helps when days turn hot.
Aim for at least 6 hours of direct light if you want sturdy, flavorful leaves. You should also think about space considerations before planting. Give each plant enough room to spread, because crowded kale grows smaller leaves and can invite pests.
Aim for at least 6 hours of direct light for sturdy leaves, and give each kale plant room to spread.
A location near a fence, raised bed edge, or open garden row often works well, as long as nearby plants won’t block light. Pick a spot with good air movement too, since breezes help leaves dry after rain.
If you plan ahead, you’ll set your kale up for steady growth and easier harvests all season long.
Prepare Soil for Kale

Kale grows best in loose, fertile soil that drains well, so work in plenty of compost or well-rotted manure before planting. Aim for a soil pH between 6.0 and 7.0, and use soil testing to confirm it.
If the reading’s off, add the right soil amendments to correct it and support nutrient balance. Mix in extra organic matter for better moisture retention and drainage improvement without making the bed soggy.
Good compost integration also feeds microbes and boosts earthworm activity, which helps keep soil open and fertile. If your soil stays cold, wait until it warms slightly, since kale roots grow better in moderate soil temperature.
You can also tuck in companion planting partners nearby, but keep the bed weed free so kale doesn’t compete for nutrients. Prep the soil thoroughly now, and you’ll give your plants a strong start all season long.
Plant Kale From Seed or Transplants
With the soil ready, you can sow kale seeds directly in the garden or start with transplants for a quicker harvest. If you choose seed, plant them about 1/4 inch deep and space them according to the packet. Then thin seedlings once they sprout.
For transplants, set each young plant at the same depth it grew in its container, and firm the soil around the roots. Good transplanting techniques help reduce shock and give kale a strong start.
Keep an eye on kale seedling care by removing weak sprouts, watching for crowded growth, and protecting tender plants from pests. Choose a spot with full sun to light shade, and give each plant enough room to spread its leaves.
You can stagger sowing every few weeks to extend your harvest. Whether you start from seed or transplants, planting carefully now sets up healthy, productive kale later.
Water Kale Consistently
Keep the soil evenly moist so your kale grows tender, flavorful leaves and doesn’t slow down in dry spells. Check the top inch of soil often, and water whenever it feels dry. Aim the water at the base so roots get a deep drink without wetting the foliage more than necessary.
A steady routine helps kale stay productive, especially during warm weather when moisture disappears faster. If you want extra control, use drip irrigation to deliver water slowly and directly where roots need it. That method also reduces waste and keeps watering simple.
You should avoid letting the soil swing from dry to soggy, because those changes stress plants and can slow growth. Water early in the day when possible, so plants can take up moisture before heat rises. Consistent moisture supports leafy harvests and helps your kale grow strong throughout the season.
Mulch Around Kale Plants
You can mulch kale with straw, shredded leaves, or compost to help keep the soil cool and moist. Just spread a 2- to 3-inch layer around the plants. But be sure to keep the mulch away from the stems so you don’t trap too much moisture.
Mulching also helps block weeds and supports steady growth throughout the season. It’s a simple step that makes a big difference!
Mulch Types for Kale
A 2- to 3-inch layer of mulch helps kale stay cool, conserve moisture, and suppress weeds. You can choose organic mulch for the best soil benefits.
Straw mulch breaks down slowly and keeps leaves clean, while wood chips work well in paths or around established plants. Leaf mold adds a soft, rich layer, and grass clippings can feed the bed as they decompose.
Cocoa hulls look neat and smell pleasant, but use them only if pets won’t reach them. Compost mulch boosts fertility and moisture retention at the same time. Burlap covers can help hold mulch in place during windy spells.
Synthetic mulch and shredded paper can also block weeds, though they won’t improve soil like natural materials do.
Apply Mulch Properly
After planting or when seedlings are a few inches tall, spread mulch around kale plants in a 2- to 3-inch layer. Leave a small gap around each stem so moisture doesn’t collect against the crown. You’ll keep the bed tidy and help roots settle in.
Use a light hand and check the layer after rain or watering.
- Keep mulch loose, not packed.
- Refill thin spots as it settles.
- Pull stray weeds before they spread.
- Choose compost for added compost benefits.
- Watch for steady moisture retention.
Aim the mulch at the soil, not the leaves, and stop short of burying the stem. In hot weather, you may need a little more. In cool, wet periods, you can thin it out.
Benefits of Mulching Kale
Mulching kale helps the soil hold moisture evenly, which keeps roots from drying out between waterings. You also block weeds, so your plants can claim more light, nutrients, and space.
As the mulch breaks down, it enriches the bed and supports steady growth that can improve kale nutrition. It also moderates soil temperature, helping kale stay productive during hot spells and cold snaps.
Use straw, shredded leaves, or fine compost and keep it a few inches from the stems. With smart mulching techniques, you reduce splashback from rain, which can limit soilborne problems on leaves.
Check the layer often and refresh it when it thins. Done well, mulch makes kale easier to grow and harvest.
Fertilize Kale for Bigger Leaves
To help kale grow bigger, leafier plants, feed it with a balanced fertilizer or compost-rich amendment when you plant and again during the growing season. You’ll get the best results when you choose organic fertilizers and match them to your soil’s needs.
Rich soil amendments build steady growth, while careful nutrient timing keeps plants from going pale or stalling. For a quick boost, use liquid nutrients or compost tea every few weeks, especially after harvests. If you want faster uptake, foliar feeding can help, but don’t overdo it.
Work compost into the bed before planting.
Side-dress plants with aged manure or worm castings.
Use a diluted liquid feed when leaves slow down.
Apply compost tea to support steady growth.
Feed lightly, but consistently, for tender leaves.
Watch your plants closely and adjust feeding if growth looks weak or the leaves seem small.
Protect Kale From Pests and Frost
Keep your kale safe from pests and cold snaps by checking plants often and covering them when needed. Look under leaves for aphids, caterpillars, and slugs, then remove them by hand or spray them off with water.
You can also use natural repellents like neem oil or garlic spray to discourage feeding without harming the plants. If cabbage worms keep appearing, place row cover over young plants so insects can’t reach them.
When nighttime temperatures drop, drape frost blankets over the bed before dusk and secure the edges with stones or clips. Lift the cover in the morning so your kale gets light and air. Mulch around the base to steady soil temperature and reduce stress.
Healthy, protected plants stay crisp, vigorous, and ready to keep growing through changing weather.
Harvest Kale at the Right Time
Once your kale plants are healthy and full, you can start harvesting outer leaves as soon as they’re big enough to eat, usually when they reach 6 to 8 inches long. Pick the outer, lower leaves first so the center keeps growing. This gives you the best harvest because younger leaves taste tender, while mature leaves can turn tough and bitter.
Check leaves for rich color and firm texture. Harvest in the morning for crisp greens. Snip each leaf close to the stem. Leave the growing tip untouched. Watch plants weekly for ideal timing.
If you wait too long, leaves may get coarse, so taste a few and choose what suits you. Harvesting little and often helps you enjoy steady bunches without stressing the plant. Keep your cuts clean, and you’ll stay on track for fresh kale from your garden.
Extend Your Kale Harvest
To keep your kale harvest going longer, start by picking the outer leaves first. This way, the plant can keep growing right from the center. Make sure to keep your kale well-watered—it helps the leaves grow steadily and keeps the plant from getting stressed. Also, try to harvest before the plant starts bolting. Warm weather can make the leaves tougher and more bitter pretty quickly, so timing is key!
Pick Outer Leaves
Start by harvesting the outer kale leaves first, leaving the center of the plant intact so it can keep growing. You’ll get the best leaf selection when you choose mature, full-sized leaves near the base. Snip them with clean scissors or pinch stems by hand using steady harvesting techniques.
Pick leaves that look crisp and deeply colored. Avoid the small inner leaves at the crown. Harvest from several plants for balance. Remove damaged or yellowing leaves first. Leave the growing tip untouched.
Keep Plants Well-Watered
Keep your kale evenly watered so the plants stay productive and the leaves remain tender. Water at the soil line, not over the foliage, so moisture reaches the roots quickly and you waste less.
Mulch around each plant to slow evaporation and help the soil hold a steady level of moisture. If rain doesn’t provide enough, give deep soakings rather than frequent light sprinkles. That approach encourages stronger roots and better growth.
Track your kale watering techniques by feeling the top inch of soil; if it’s dry, it’s time to water. Your ideal watering schedule depends on heat, soil type, and container size, but consistency matters most.
When you keep moisture balanced, your kale stays vigorous and continues producing flavorful leaves longer.
Harvest Before Bolting
As your kale stays well-watered and healthy, harvest leaves early to keep the plants producing and prevent them from bolting in warm weather. Pick the outer leaves first, and let the center keep growing for a longer harvest.
Focus on bolting prevention by checking plants often during stretches above ideal temperatures. When you stay ahead of heat, you’ll get tender greens longer.
Snip mature leaves when they reach usable size. Leave the growing tip untouched. Harvest in the morning for crisp texture. Watch for flower stalks forming. Pull plants once flavor turns bitter.
Frequently Asked Questions
How Do I Store Kale After Harvesting?
Store your kale in the fridge right after harvest for the best freshness. First, rinse it, then dry it thoroughly so excess moisture doesn’t cause rot.
Wrap the fresh kale loosely in paper towels and place it in a perforated bag or container. For longer kale storage, keep it in the crisper drawer.
You can also blanch and freeze it if you won’t use it soon.
Can Kale Grow in Containers Indoors?
Yes, kale can grow in containers indoors, and you can make it thrive with bright light and steady care. You’ll do best with a deep pot, rich potting mix, and good drainage.
For indoor gardening, place it near a sunny window or under grow lights. Use these container tips: water when the top inch dries, rotate the pot, and harvest outer leaves often. You’ll enjoy fresh kale year-round.
What Are Common Kale Diseases?
Common kale diseases include downy mildew, black rot, clubroot, and alternaria leaf spot. You’ll also want to watch for problems caused by kale pests.
You can spot them by yellowing leaves, stunted growth, wilting, or dark spots. You should remove infected plants, rotate crops, and avoid overhead watering to reduce spread.
If you keep leaves dry and give plants space, you’ll help kale stay healthy and productive all season long.
How Do I Save Kale Seeds for Next Year?
You can save kale seeds by letting a healthy plant bolt, flower, and form dry pods. In fact, one plant can produce hundreds of seeds, so choose your best specimen.
For successful kale seed saving, isolate it from other kale seed types if you want a true variety. Harvest the brown pods, dry them fully, then crush and store the seeds in a cool, dry place for next year.
Is Kale Safe for Pets to Eat?
Yes, kale’s generally safe for pets in small amounts, but you should watch kale toxicity levels and your pet’s digestion. You can offer a few chopped leaves as an occasional treat, not a meal replacement.
Too much kale may upset your pet’s stomach or cause gas. If your pet has kidney or thyroid issues, you shouldn’t feed it kale without your vet’s advice, because extra caution really matters.
Conclusion
Growing kale doesn’t have to be a chore. You can make it one of the easiest, most rewarding crops in your garden. Pick a good variety, give it rich soil, steady water, and a little protection, and you’ll be harvesting tender leaves before you know it.
With the right care, your kale can keep producing like a leafy miracle. Start small, stay consistent, and you’ll enjoy fresh kale for weeks on end. Remember, growing kale simply is all about keeping things manageable and enjoyable.